自己的学习笔记记录
简介
Sentinel 是面向分布式、多语言异构化服务架构的流量治理组件,主要以流量为切入点,从流量路由、流量控制、流量整形、熔断降级、系统自适应过载保护、热点流量防护等多个维度来帮助开发者保障微服务的稳定性。
Alibaba Sentinel 官方文档:https://sentinelguard.io/zh-cn/docs/introduction.html
环境部署
这里选用1.8.0版本,下载链接:https://github.com/alibaba/Sentinel/releases/tag/v1.8.0
下载后使用IDEA加载,记得修改maven路径,自动加载即可
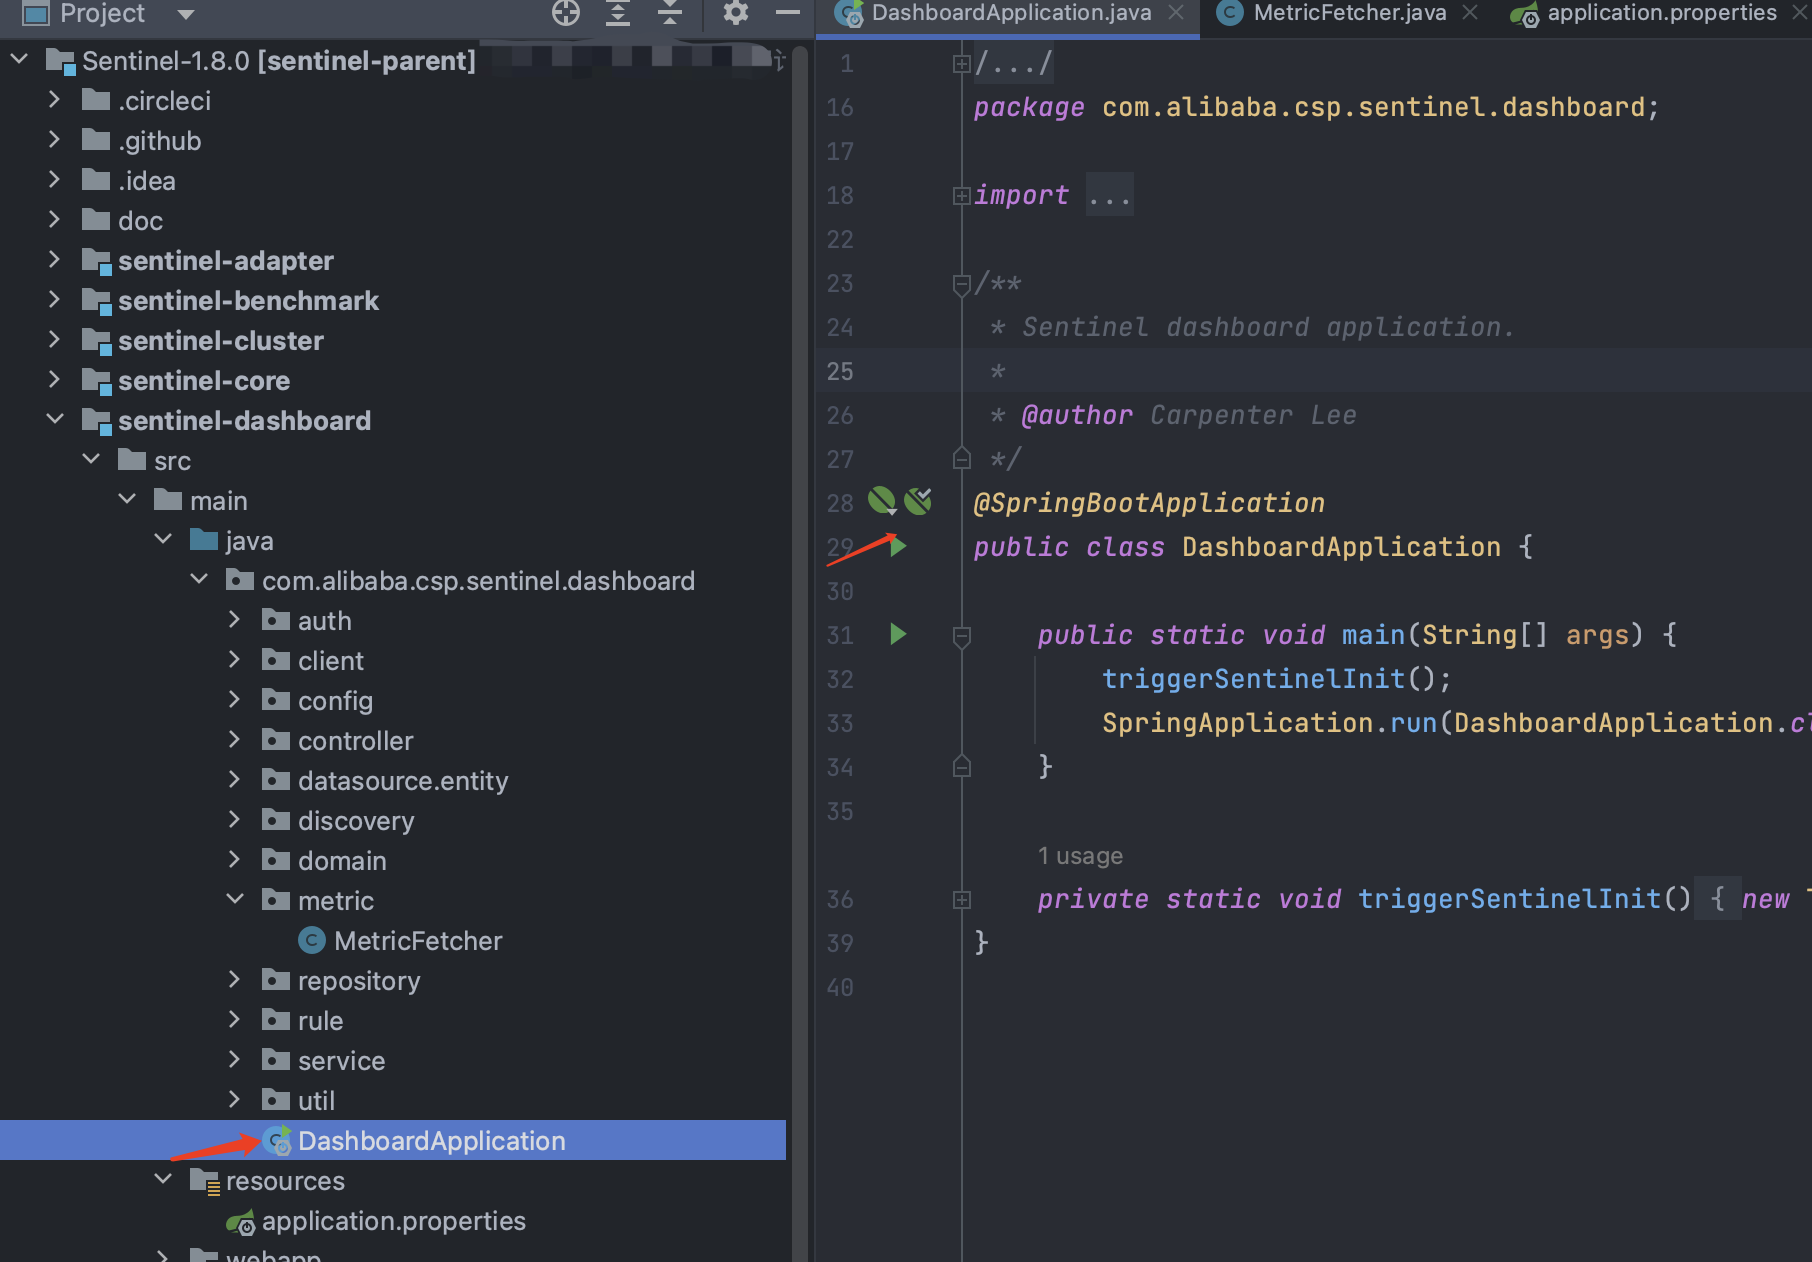
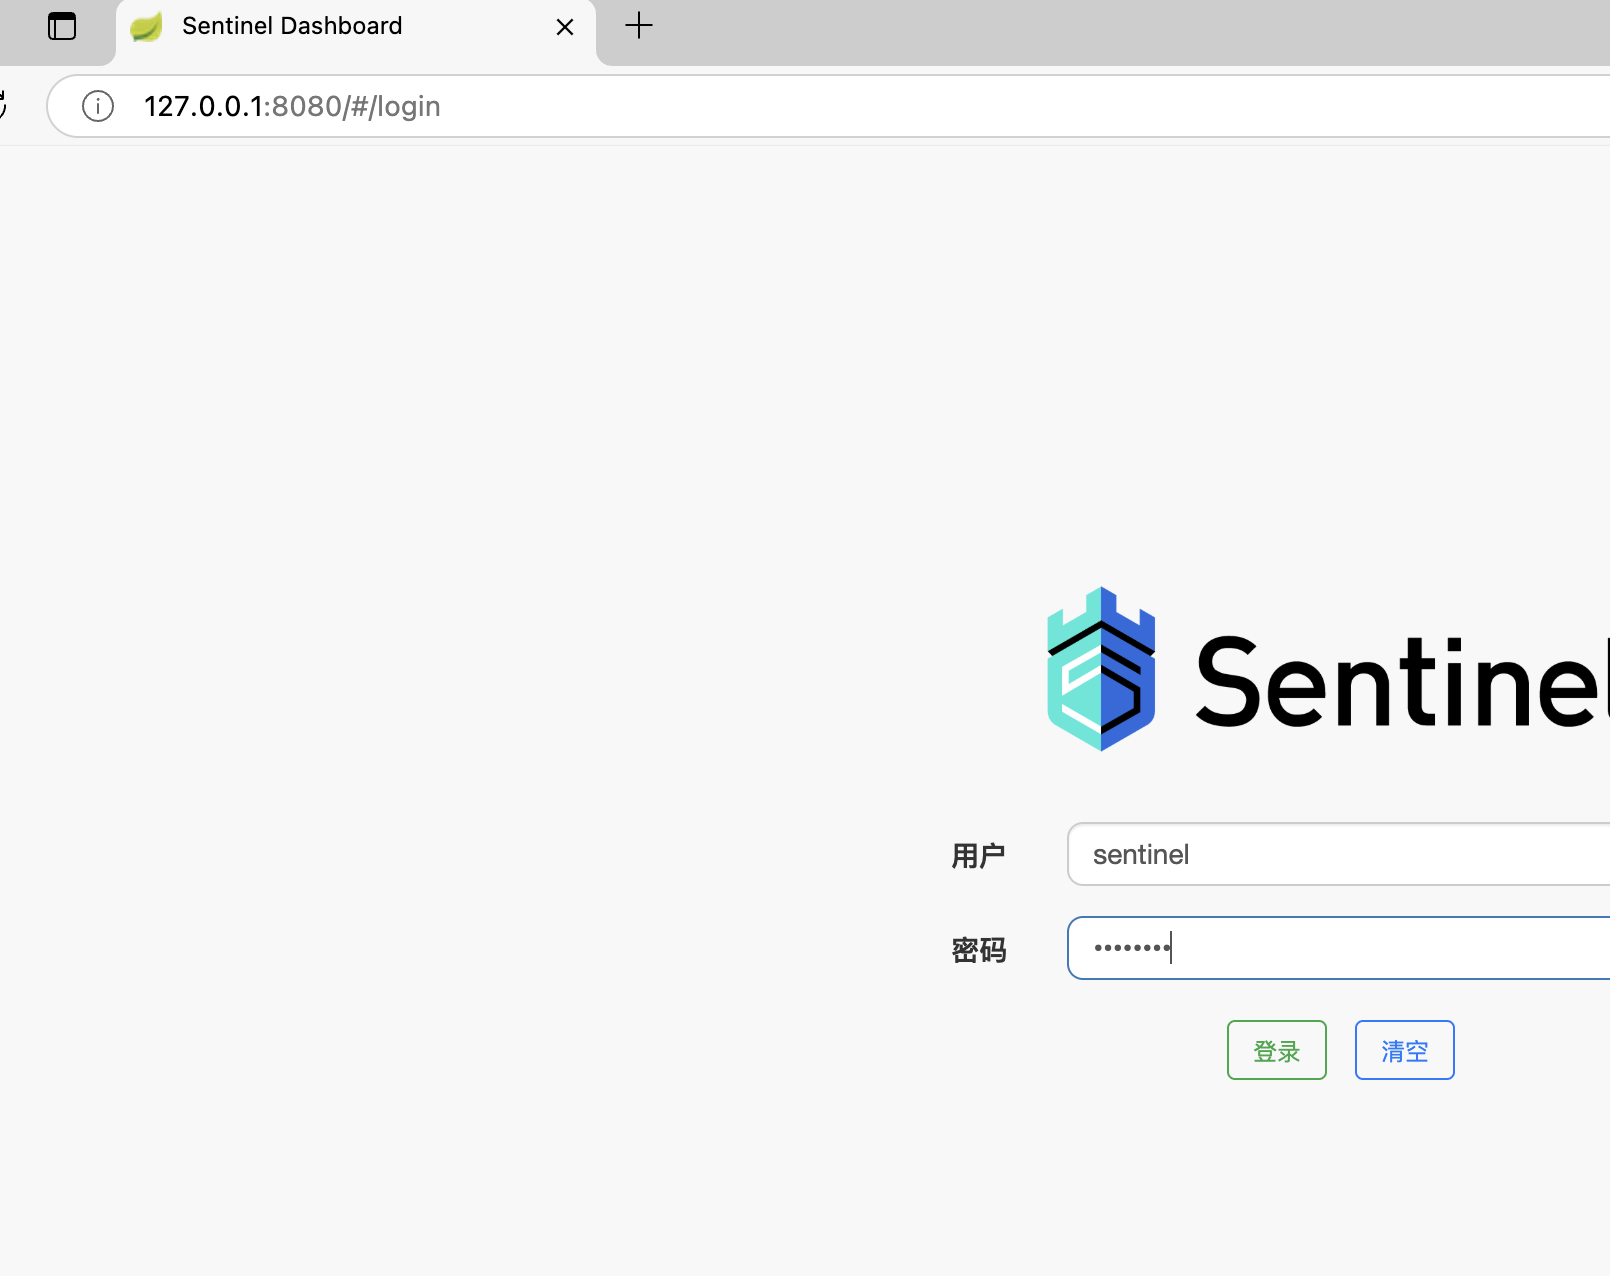
启动项目:


漏洞分析
参考: https://github.com/alibaba/Sentinel/issues/2451
从threedr3am师傅这里( https://github.com/alibaba/Sentinel/issues/2451)可以看到漏洞位置
根据师傅所说漏洞点位置漏洞点在com.alibaba.csp.sentinel.dashboard.metric.MetricFetcher#fetchOnce,去看代码分析:
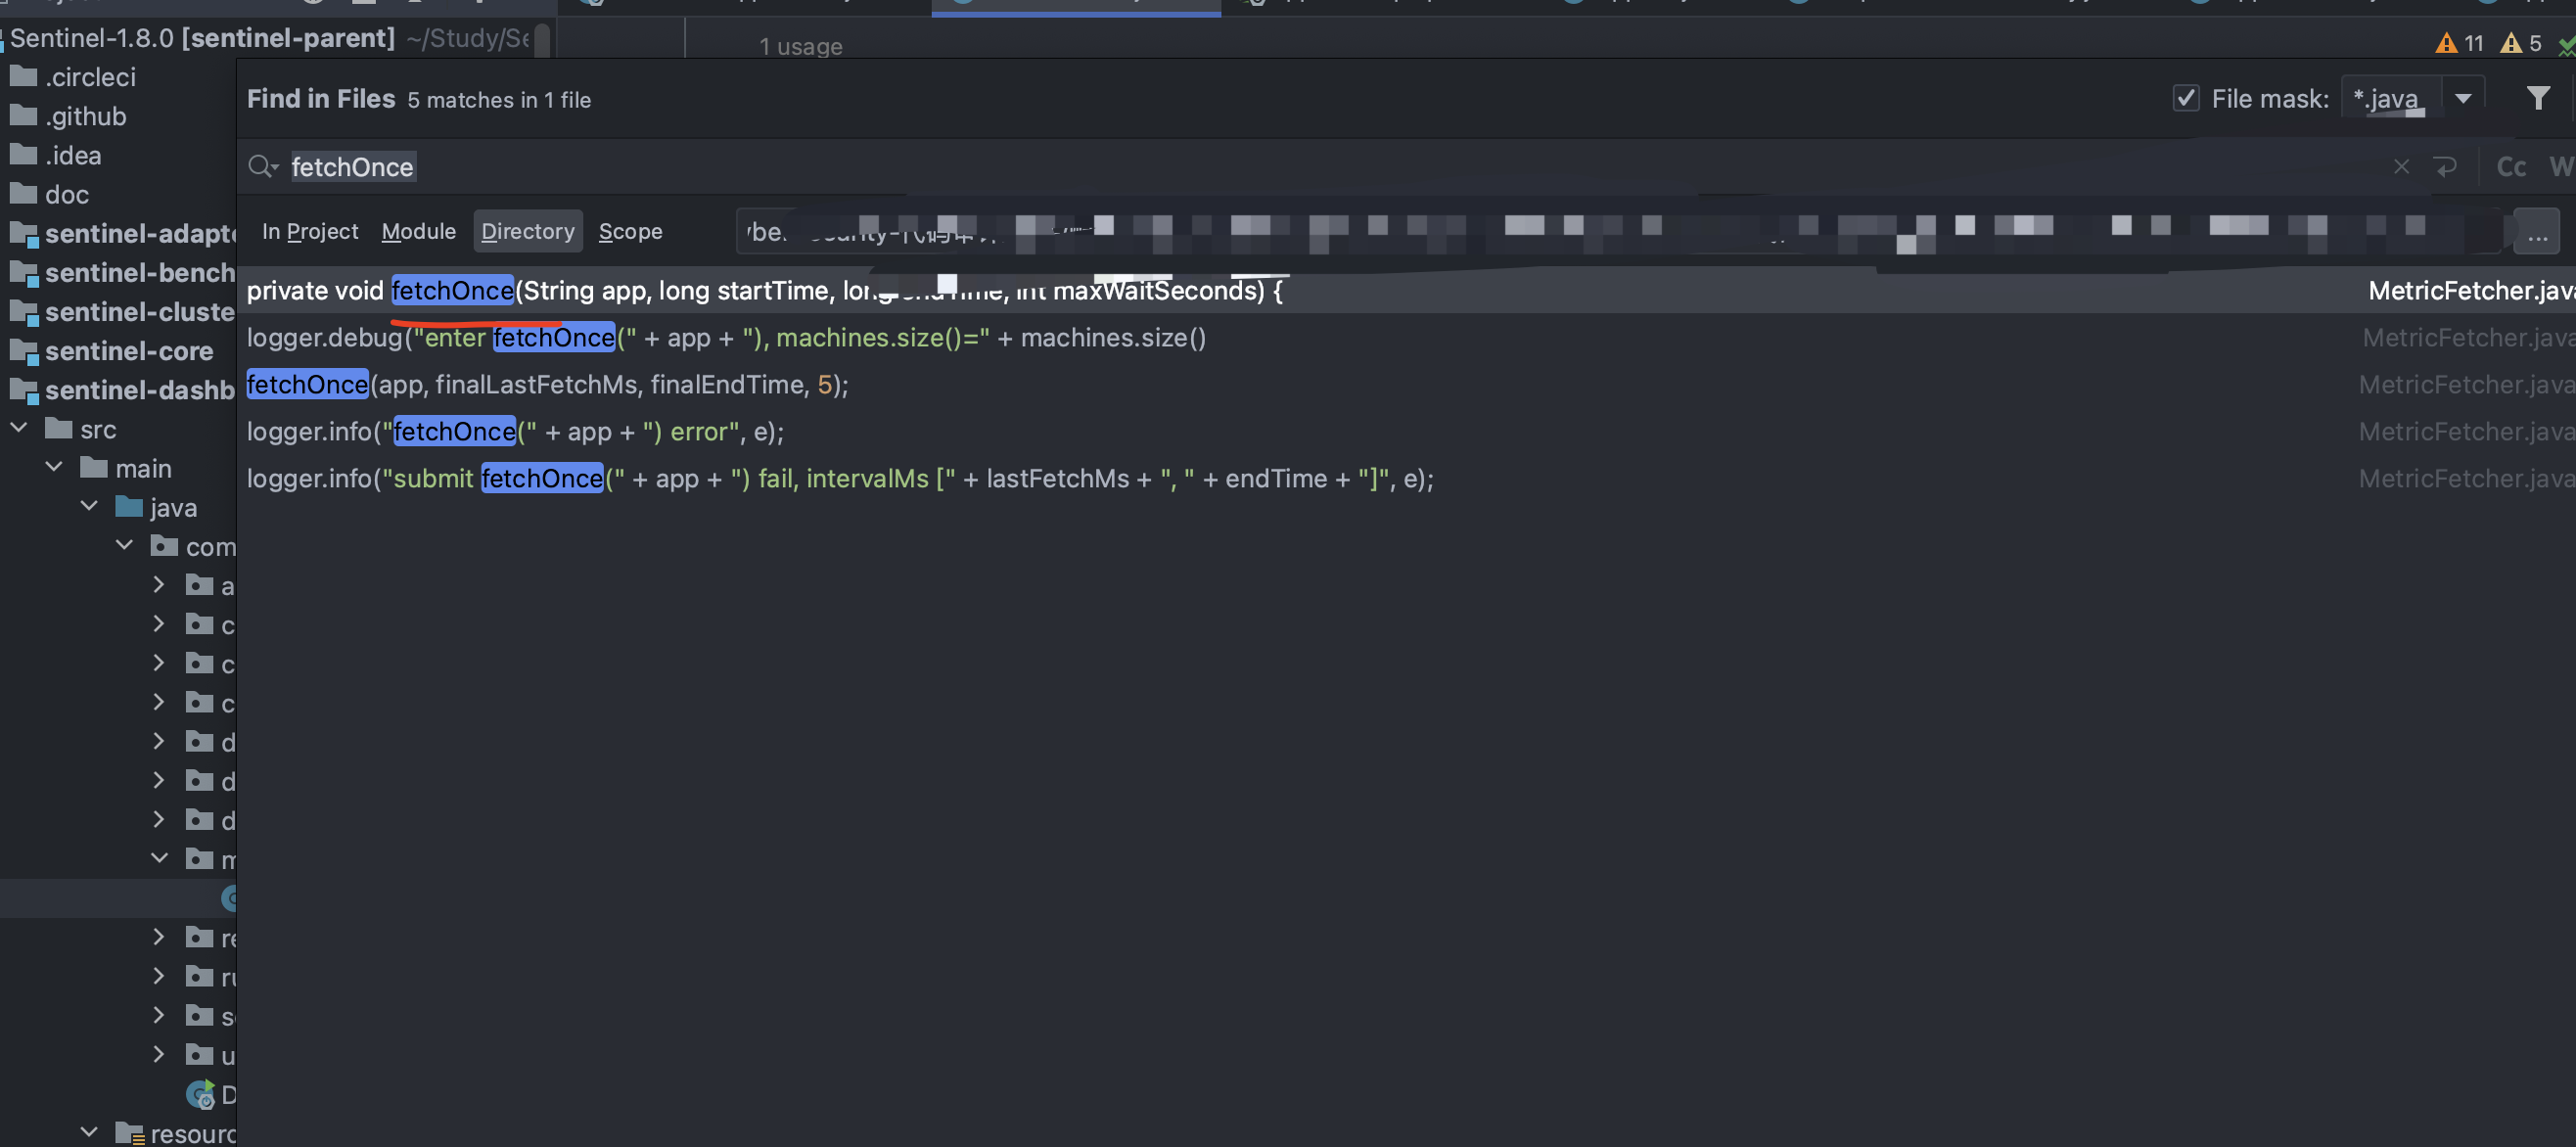
去搜索找到对应位置:

 1
 2
 3
 4
 5
 6
 7
 8
 9
10
11
12
13
14
15
16
17
18
19
20
21
22
23
24
25
26
27
28
29
30
31
32
33
34
35
36
37
38
39
40
41
42
43
44
45
46
47
48
49
50
51
52
53
54
55
56
57
58
59
60
61
62
63
64
65
66
67
68
69
70
71
72
73
74
75
76
77
78
79
80
81
82
83
84
85
86
87
88
89
90
91
92
|
 /**
     * fetch metric between [startTime, endTime], both side inclusive
     */
    private void fetchOnce(String app, long startTime, long endTime, int maxWaitSeconds) {
        if (maxWaitSeconds <= 0) {
            throw new IllegalArgumentException("maxWaitSeconds must > 0, but " + maxWaitSeconds);
        }
        AppInfo appInfo = appManagement.getDetailApp(app);
        // auto remove for app
        if (appInfo.isDead()) {
            logger.info("Dead app removed: {}", app);
            appManagement.removeApp(app);
            return;
        }
        Set<MachineInfo> machines = appInfo.getMachines();
        logger.debug("enter fetchOnce(" + app + "), machines.size()=" + machines.size()
            + ", time intervalMs [" + startTime + ", " + endTime + "]");
        if (machines.isEmpty()) {
            return;
        }
        final String msg = "fetch";
        AtomicLong unhealthy = new AtomicLong();
        final AtomicLong success = new AtomicLong();
        final AtomicLong fail = new AtomicLong();

        long start = System.currentTimeMillis();
        /** app_resource_timeSecond -> metric */
        final Map<String, MetricEntity> metricMap = new ConcurrentHashMap<>(16);
        final CountDownLatch latch = new CountDownLatch(machines.size());
        for (final MachineInfo machine : machines) {
            // auto remove
            if (machine.isDead()) {
                latch.countDown();
                appManagement.getDetailApp(app).removeMachine(machine.getIp(), machine.getPort());
                logger.info("Dead machine removed: {}:{} of {}", machine.getIp(), machine.getPort(), app);
                continue;
            }
            if (!machine.isHealthy()) {
                latch.countDown();
                unhealthy.incrementAndGet();
                continue;
            }
            final String url = "http://" + machine.getIp() + ":" + machine.getPort() + "/" + METRIC_URL_PATH
                + "?startTime=" + startTime + "&endTime=" + endTime + "&refetch=" + false;
            final HttpGet httpGet = new HttpGet(url);
            httpGet.setHeader(HTTP.CONN_DIRECTIVE, HTTP.CONN_CLOSE);
            httpclient.execute(httpGet, new FutureCallback<HttpResponse>() {
                @Override
                public void completed(final HttpResponse response) {
                    try {
                        handleResponse(response, machine, metricMap);
                        success.incrementAndGet();
                    } catch (Exception e) {
                        logger.error(msg + " metric " + url + " error:", e);
                    } finally {
                        latch.countDown();
                    }
                }

                @Override
                public void failed(final Exception ex) {
                    latch.countDown();
                    fail.incrementAndGet();
                    httpGet.abort();
                    if (ex instanceof SocketTimeoutException) {
                        logger.error("Failed to fetch metric from <{}>: socket timeout", url);
                    } else if (ex instanceof ConnectException) {
                        logger.error("Failed to fetch metric from <{}> (ConnectionException: {})", url, ex.getMessage());
                    } else {
                        logger.error(msg + " metric " + url + " error", ex);
                    }
                }

                @Override
                public void cancelled() {
                    latch.countDown();
                    fail.incrementAndGet();
                    httpGet.abort();
                }
            });
        }
        try {
            latch.await(maxWaitSeconds, TimeUnit.SECONDS);
        } catch (Exception e) {
            logger.info(msg + " metric, wait http client error:", e);
        }
        long cost = System.currentTimeMillis() - start;
        //logger.info("finished " + msg + " metric for " + app + ", time intervalMs [" + startTime + ", " + endTime
        //    + "], total machines=" + machines.size() + ", dead=" + dead + ", fetch success="
        //    + success + ", fetch fail=" + fail + ", time cost=" + cost + " ms");
        writeMetric(metricMap);
    }
|
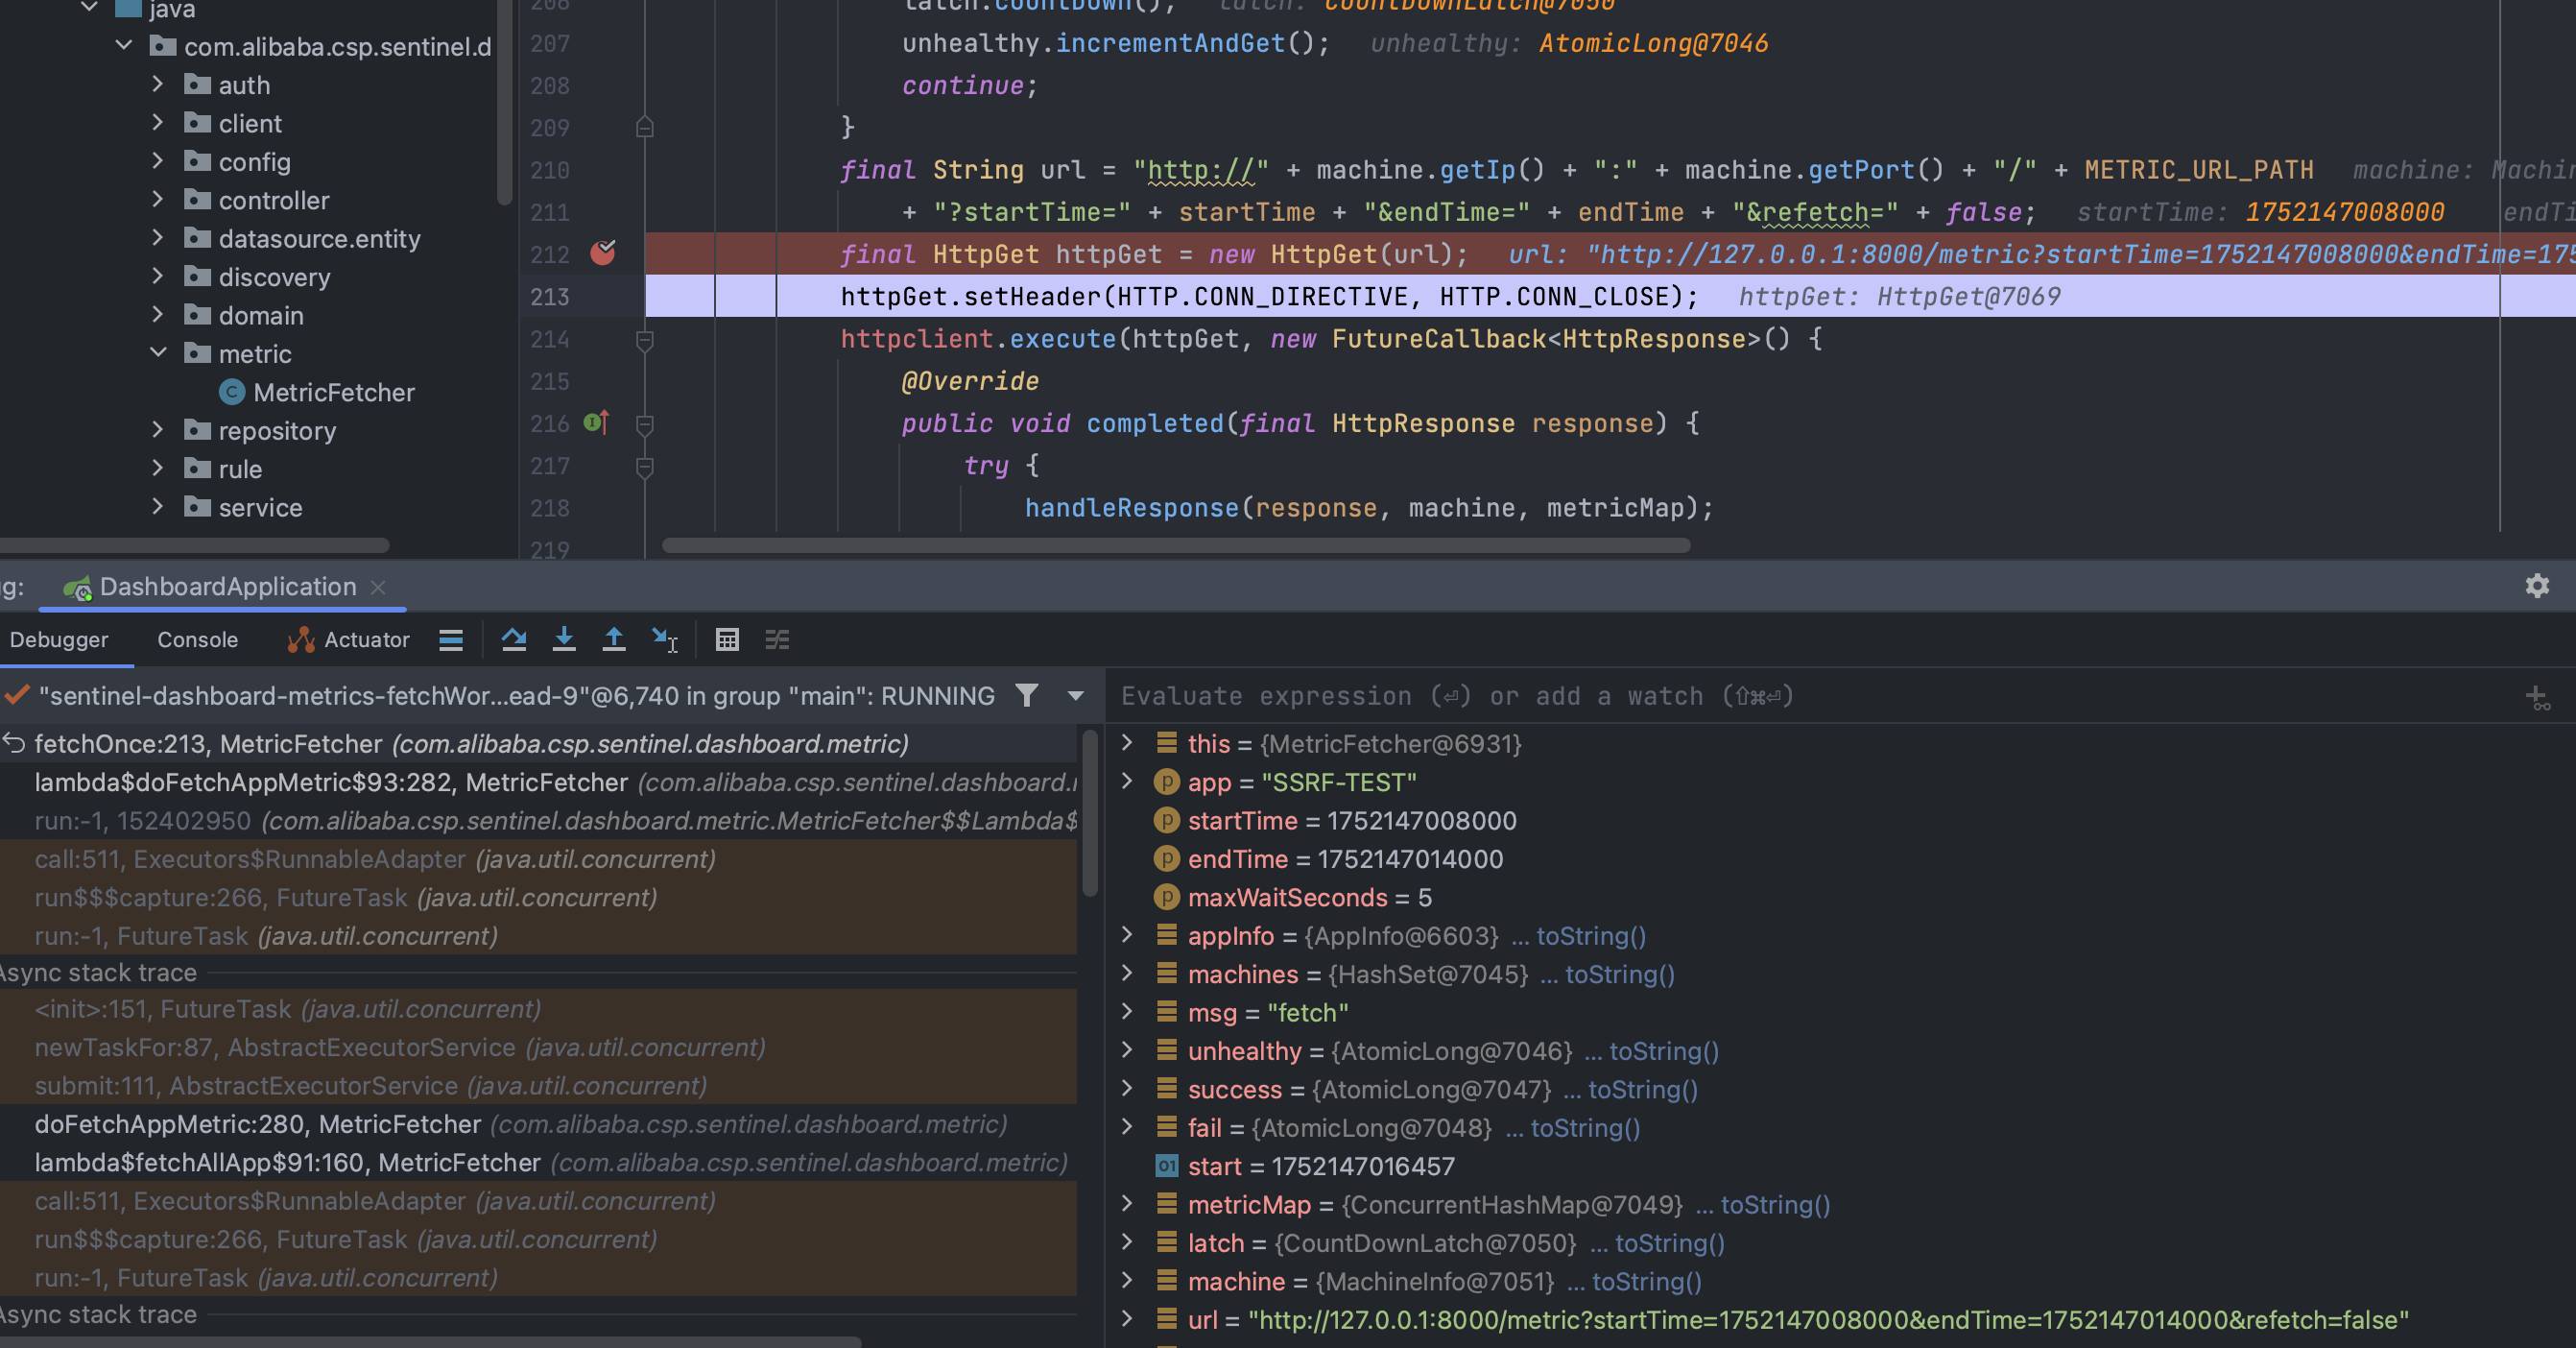
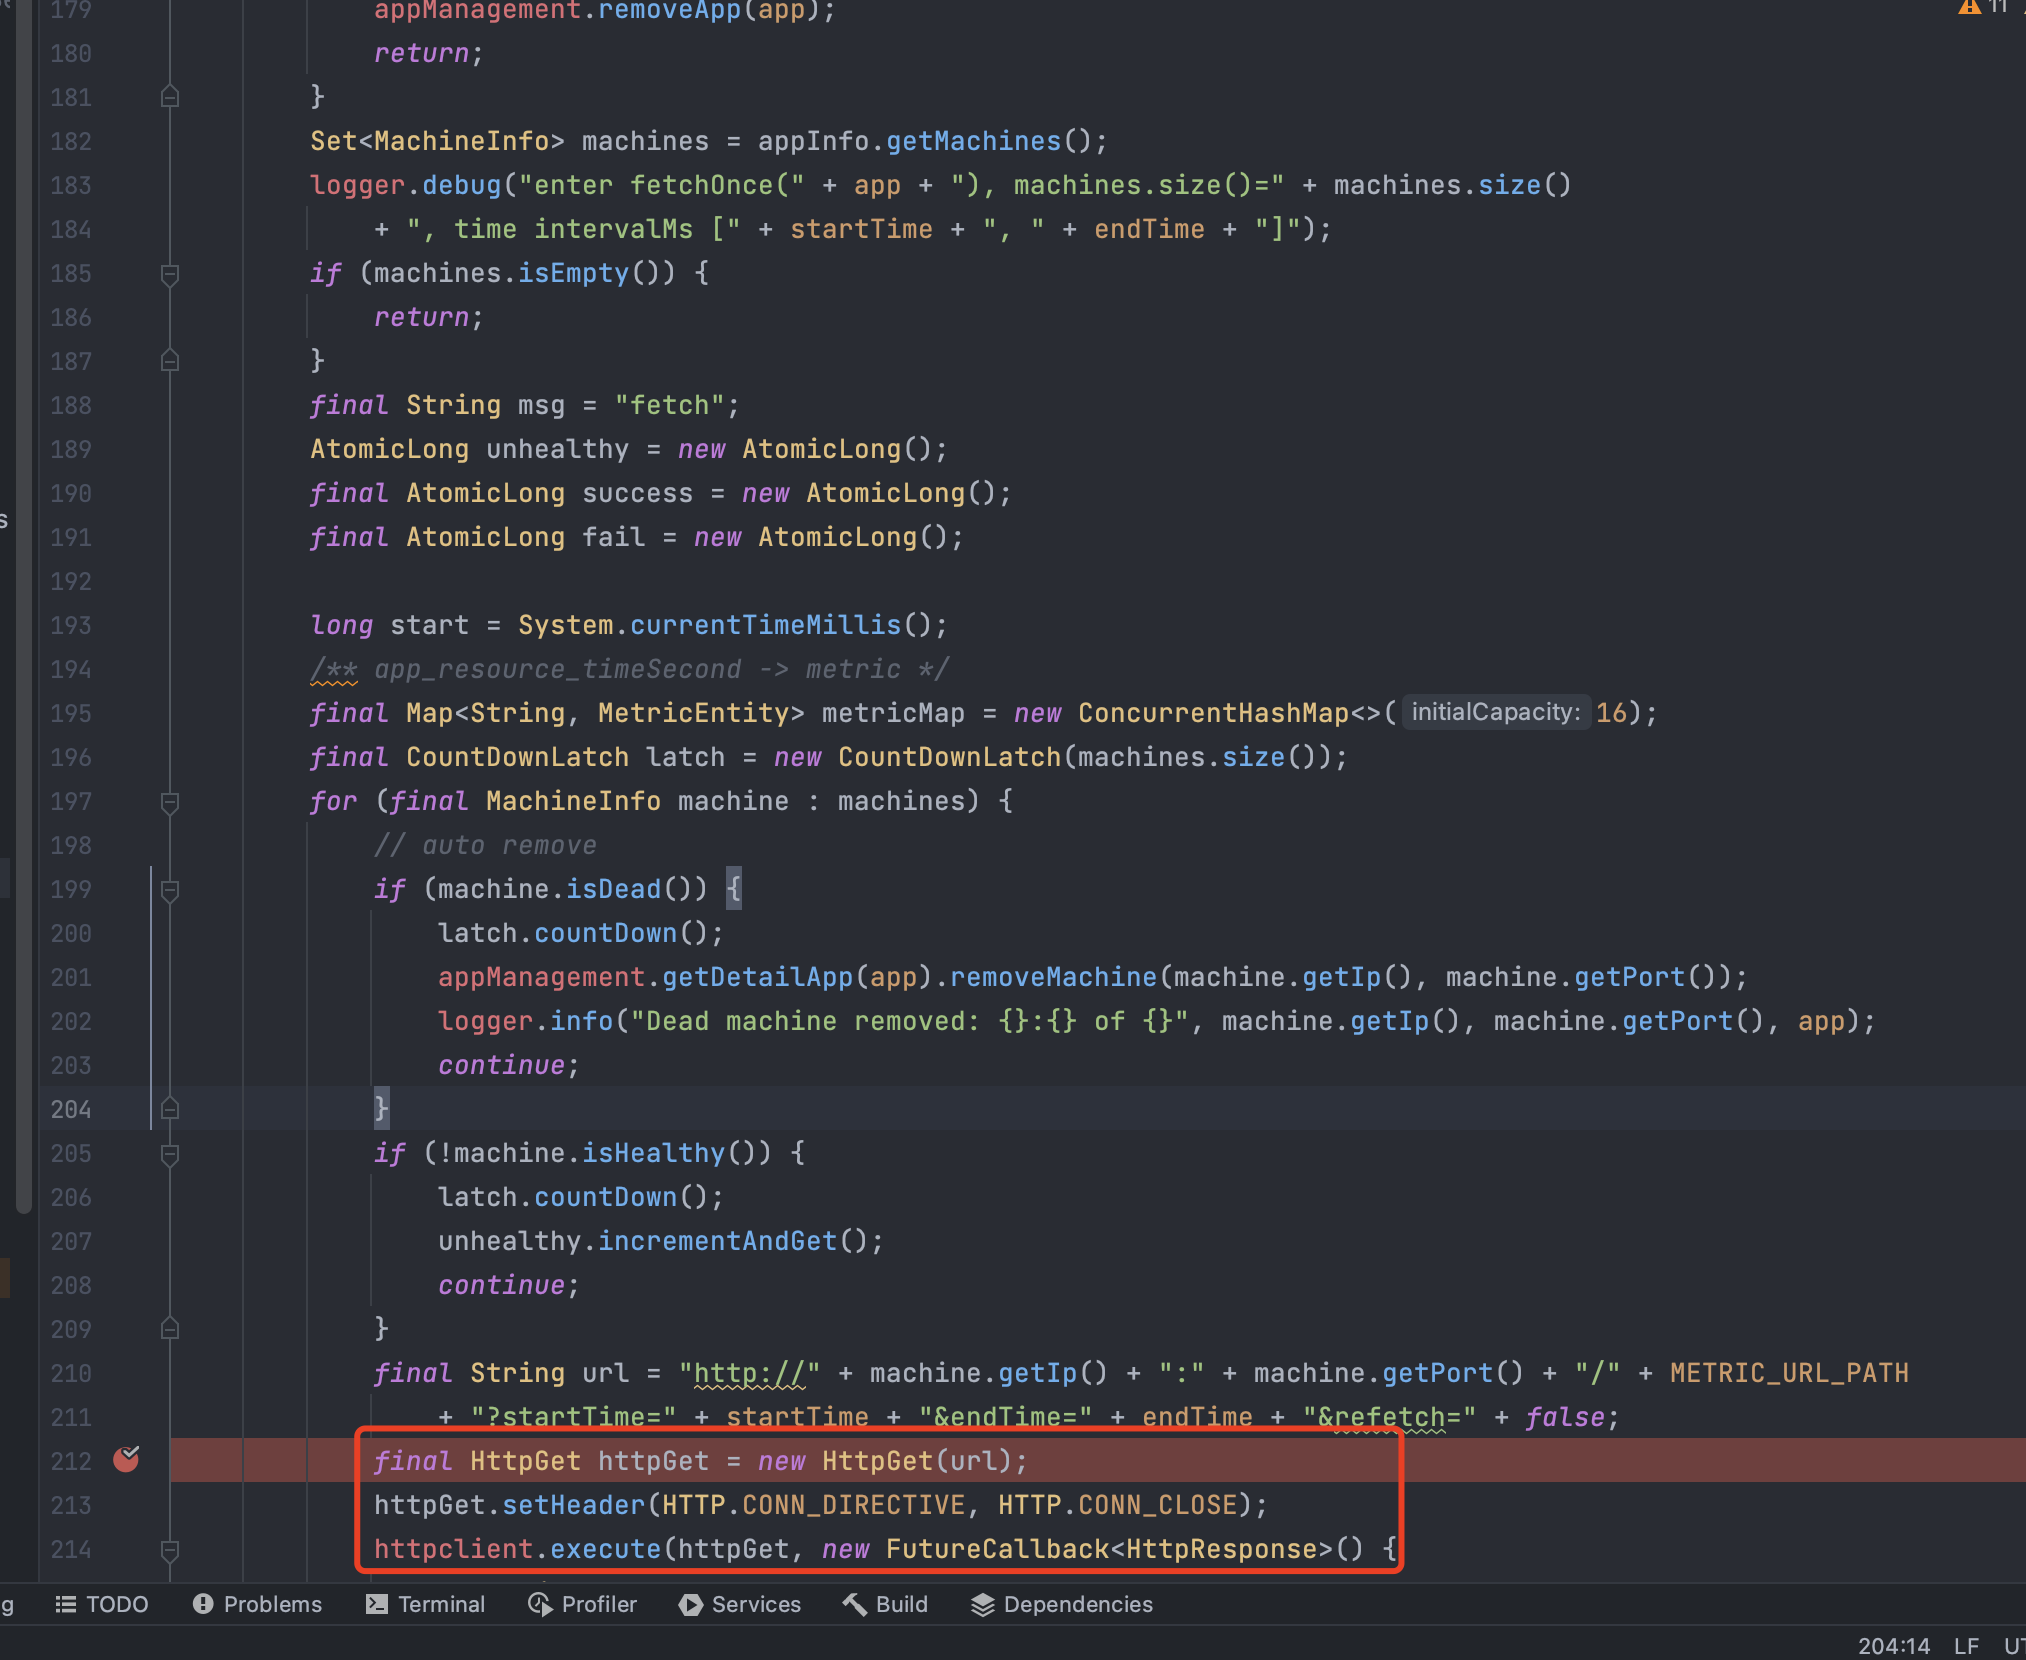
可以看到这里直接调用进行了http请求,而且没有进行任何过滤:

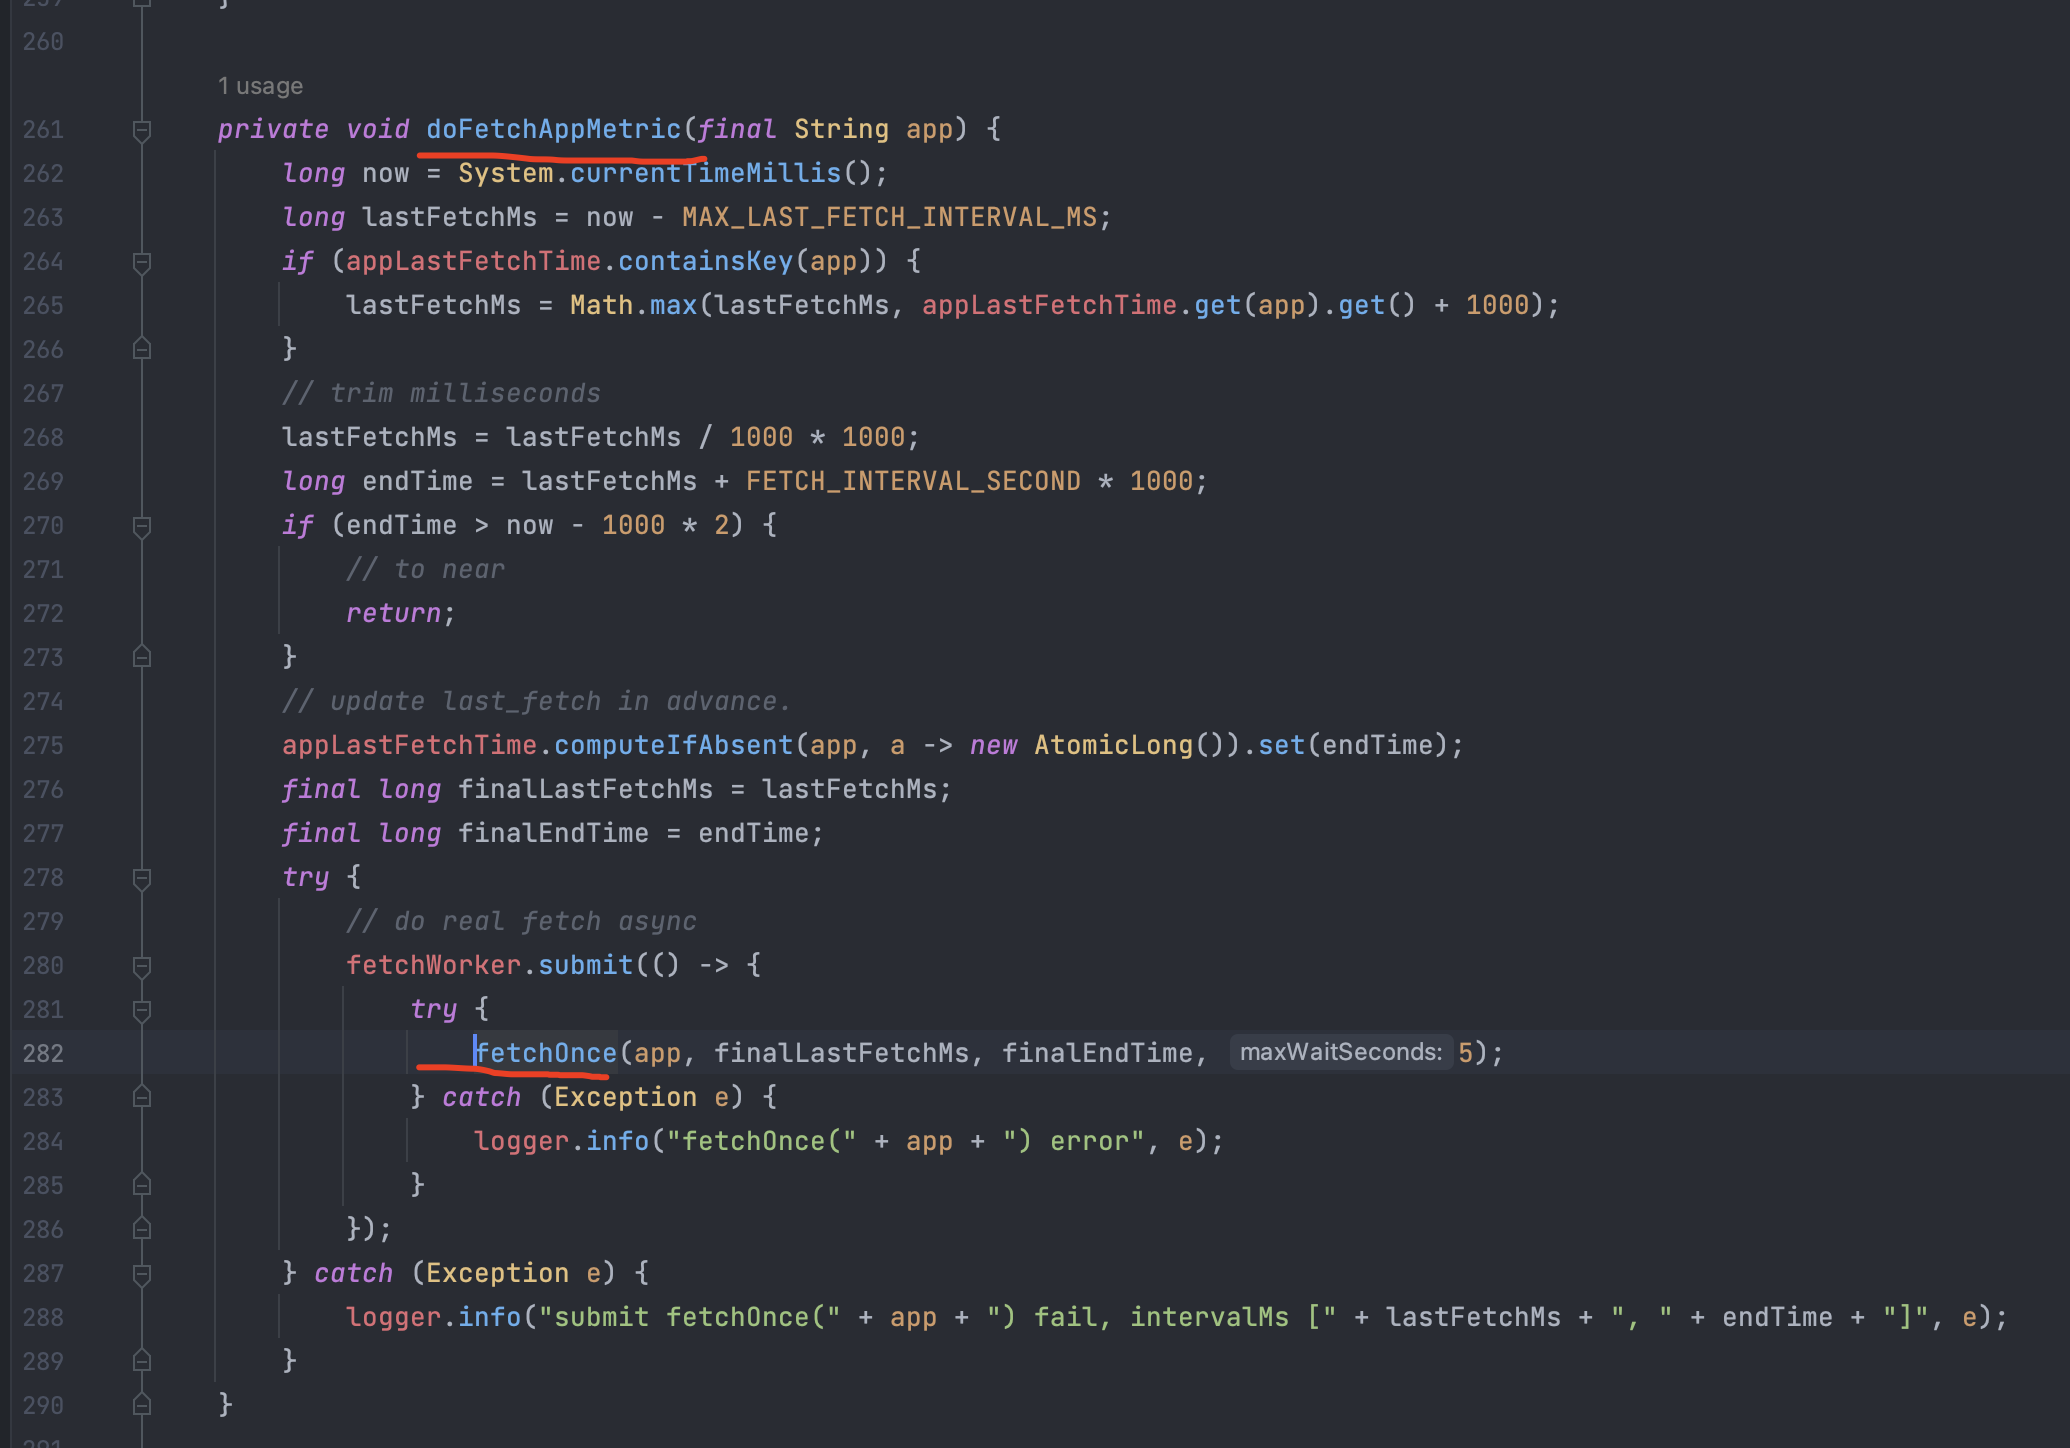
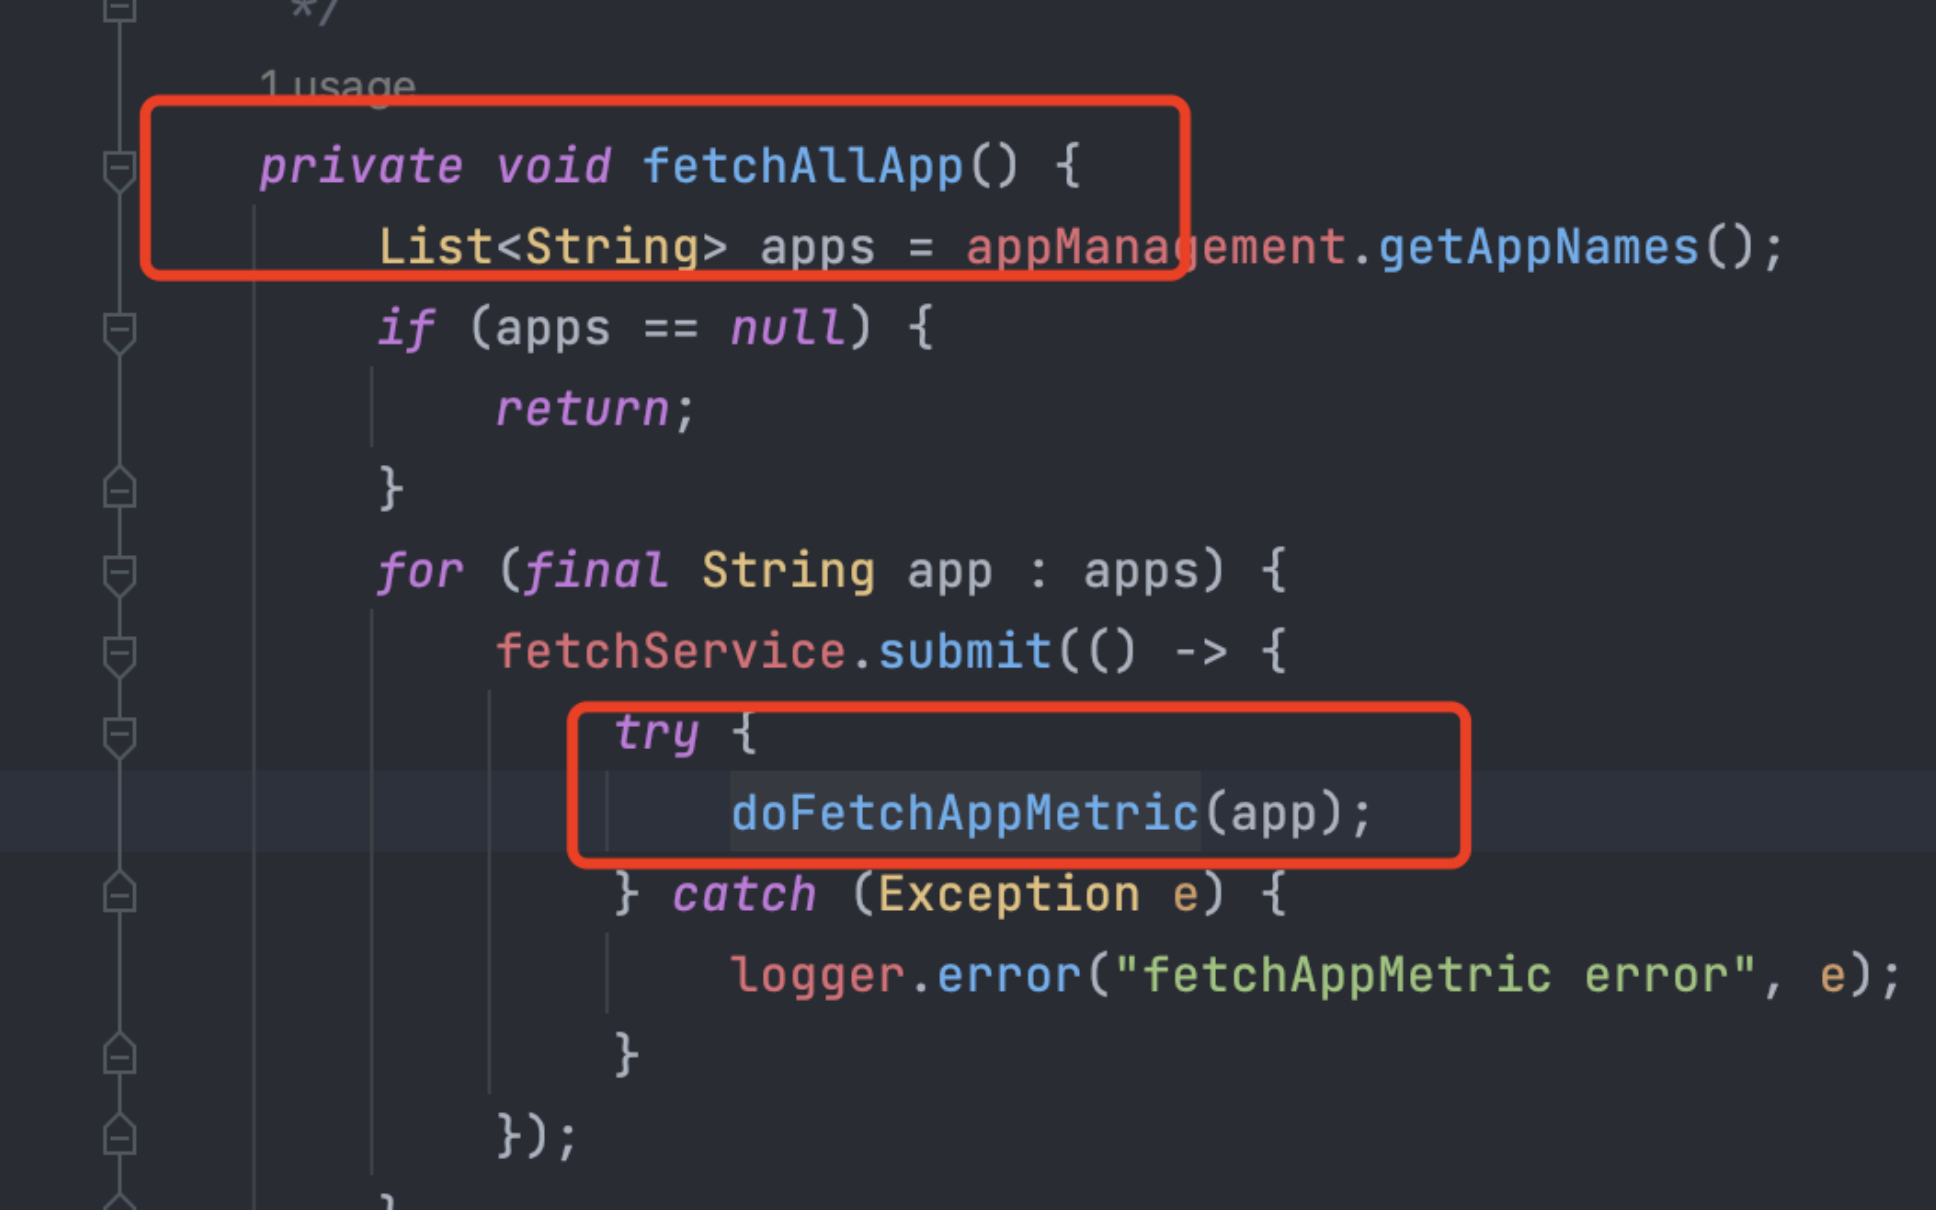
看一下是哪里调用了fetchOne,是doFetchAppMetric:

继续查看doFetchAppMetric被谁调用:是fetchAllApp

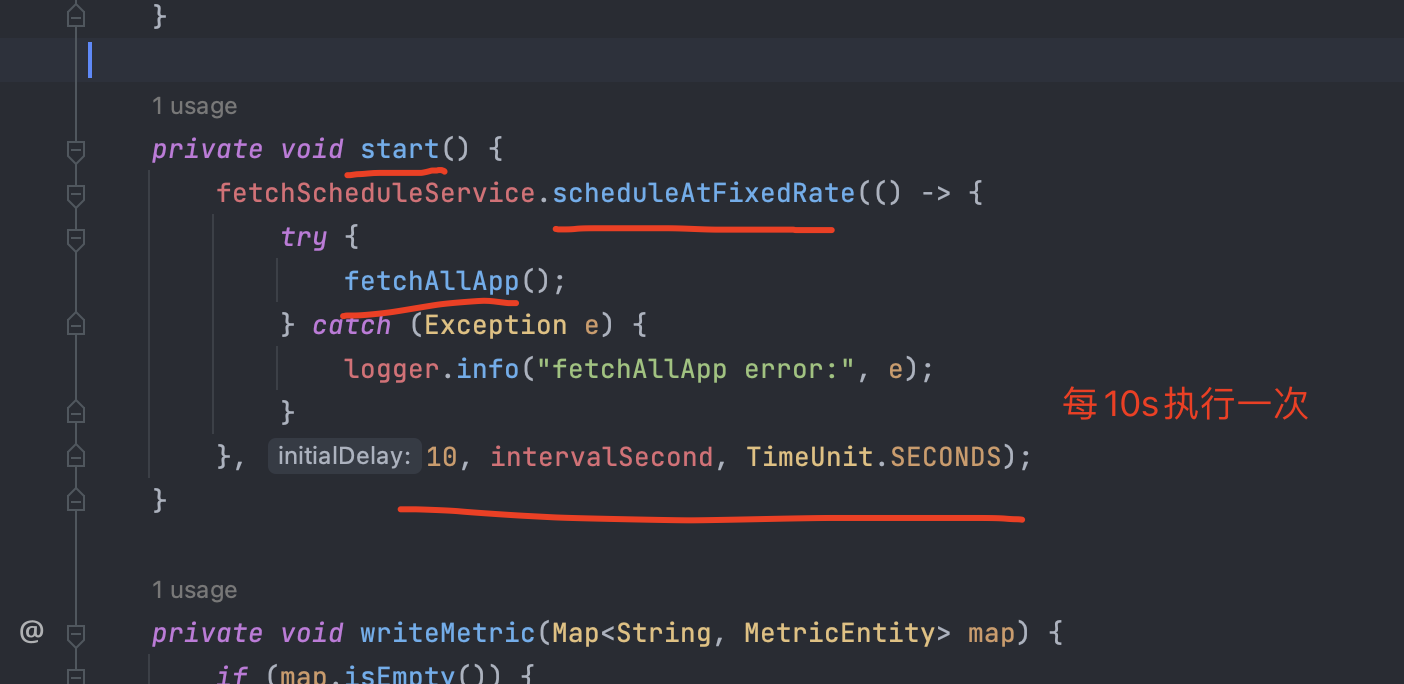
继续上翻:
可以看到在start方法中设置了一个定时任务,每隔10秒去触发一下

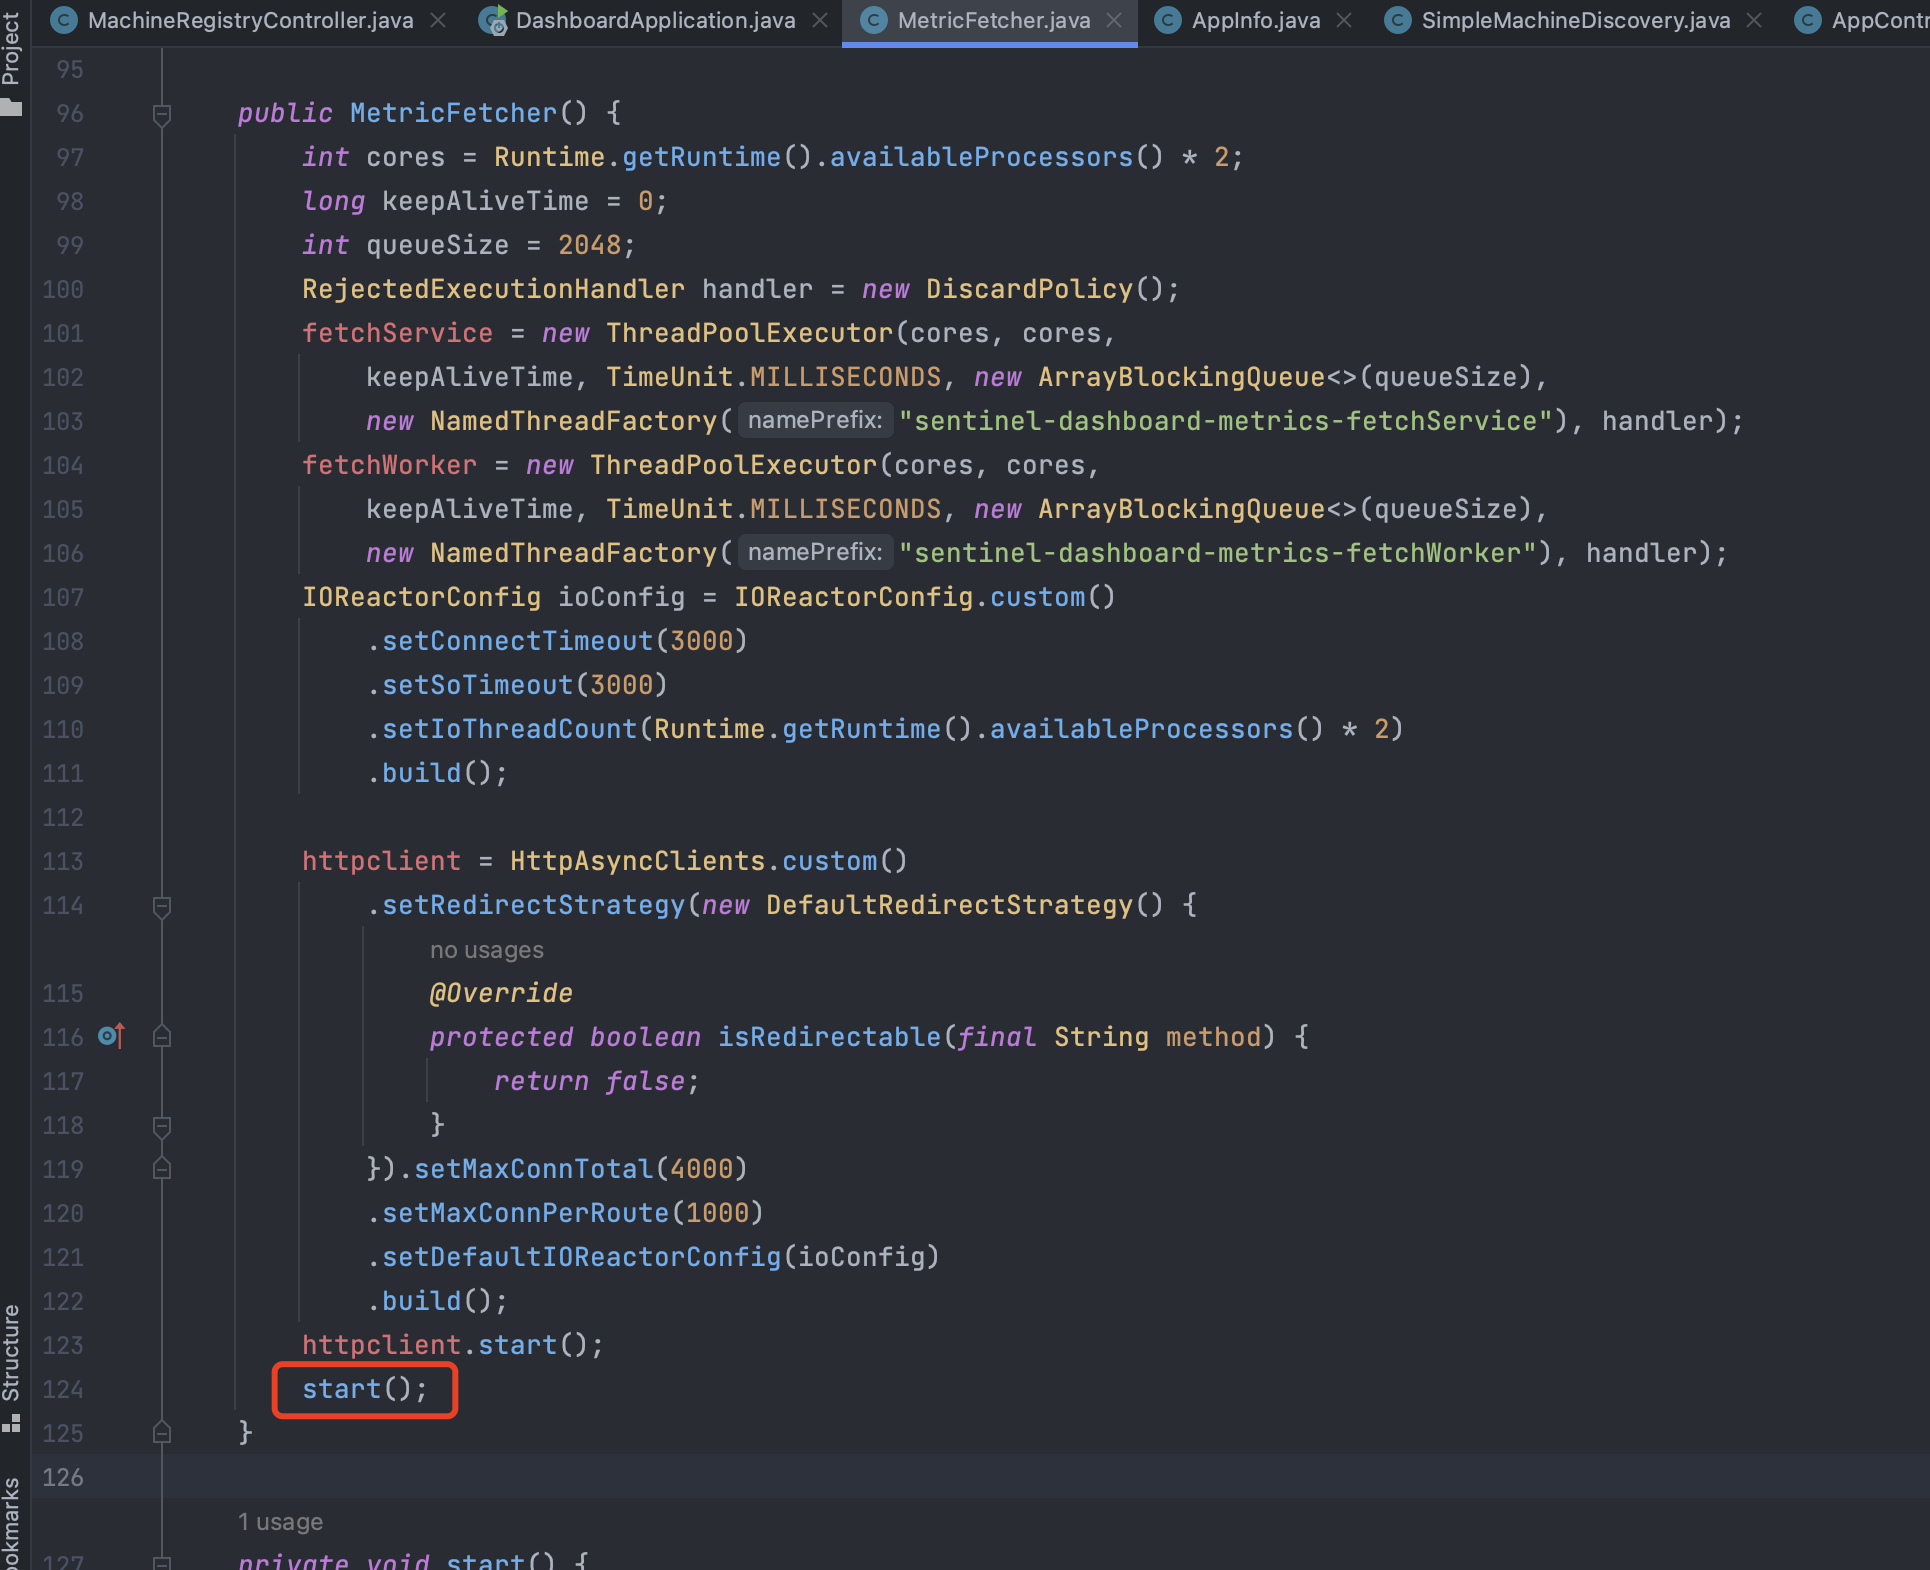
那start方法在哪调用的呢?
哦在构造器中,初始化的时候就调用了:

找到这里了,这部分找完了
是通过定时任务的方式去触发的
接下来回到最初的漏洞点,向上追踪一下参数的传递过程:
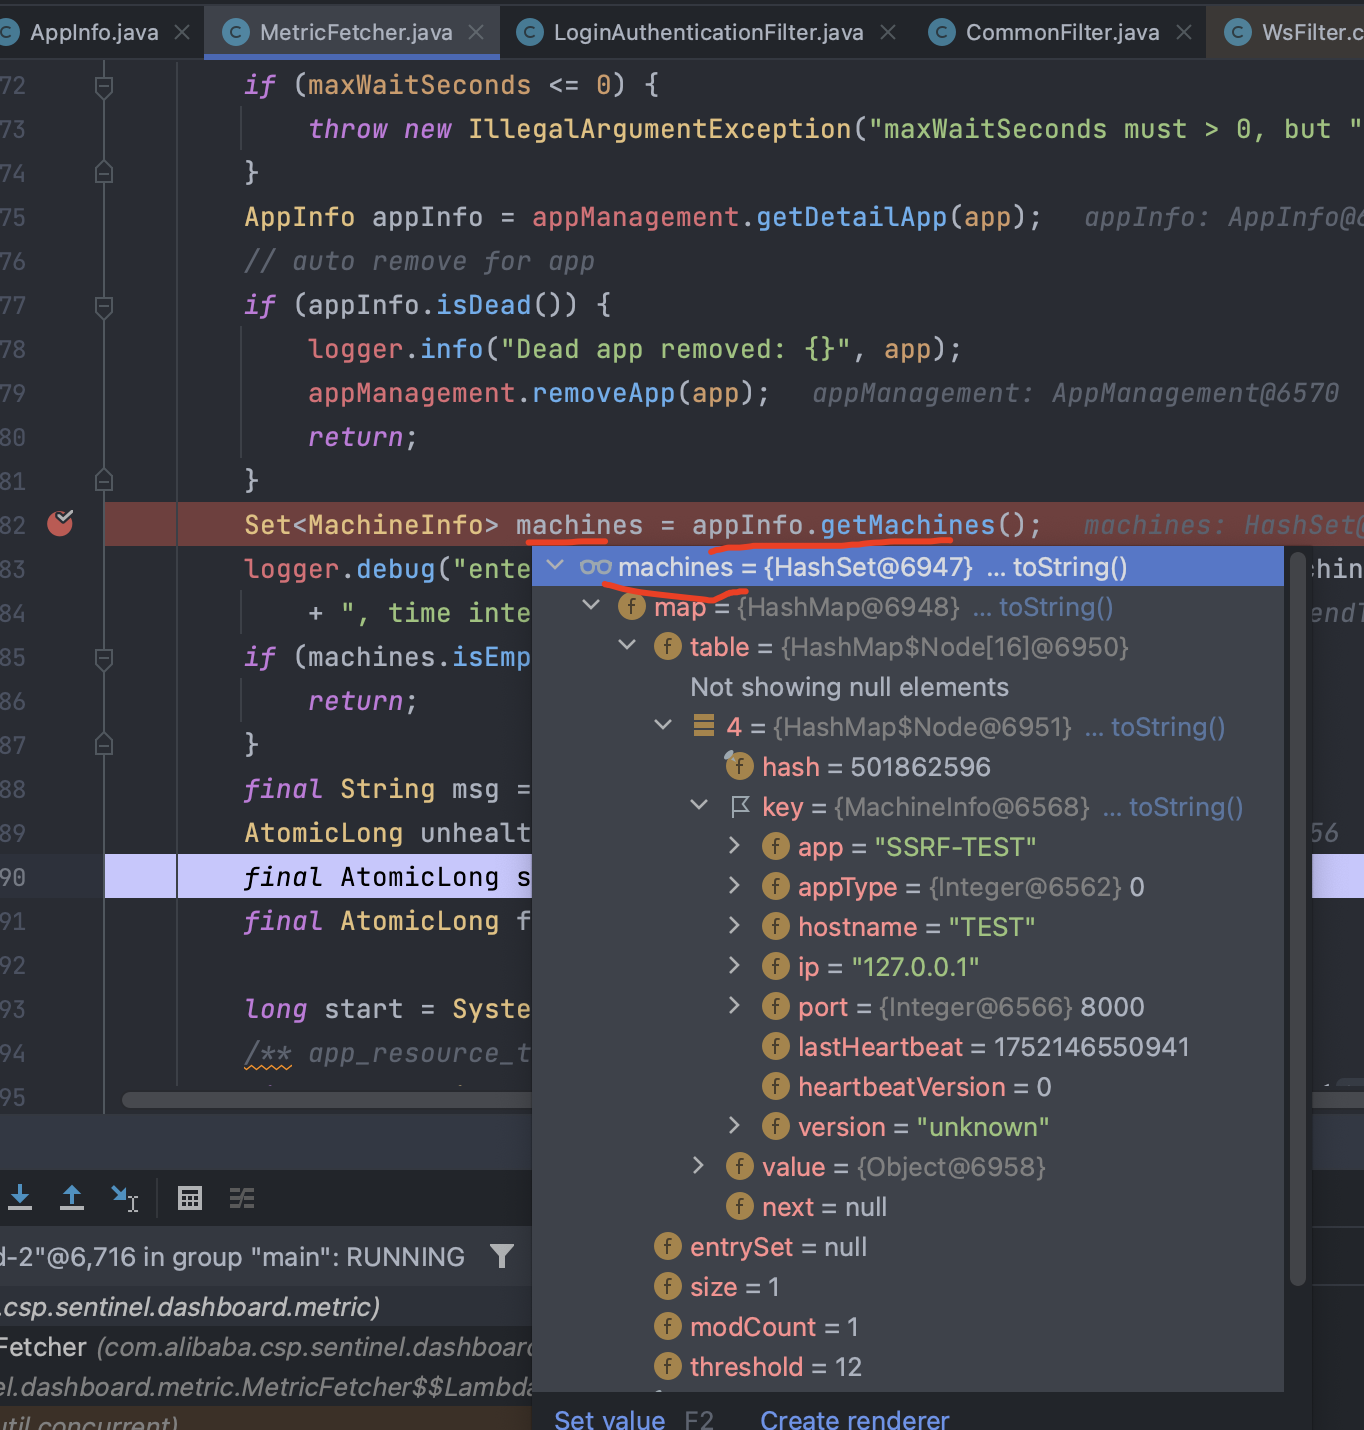
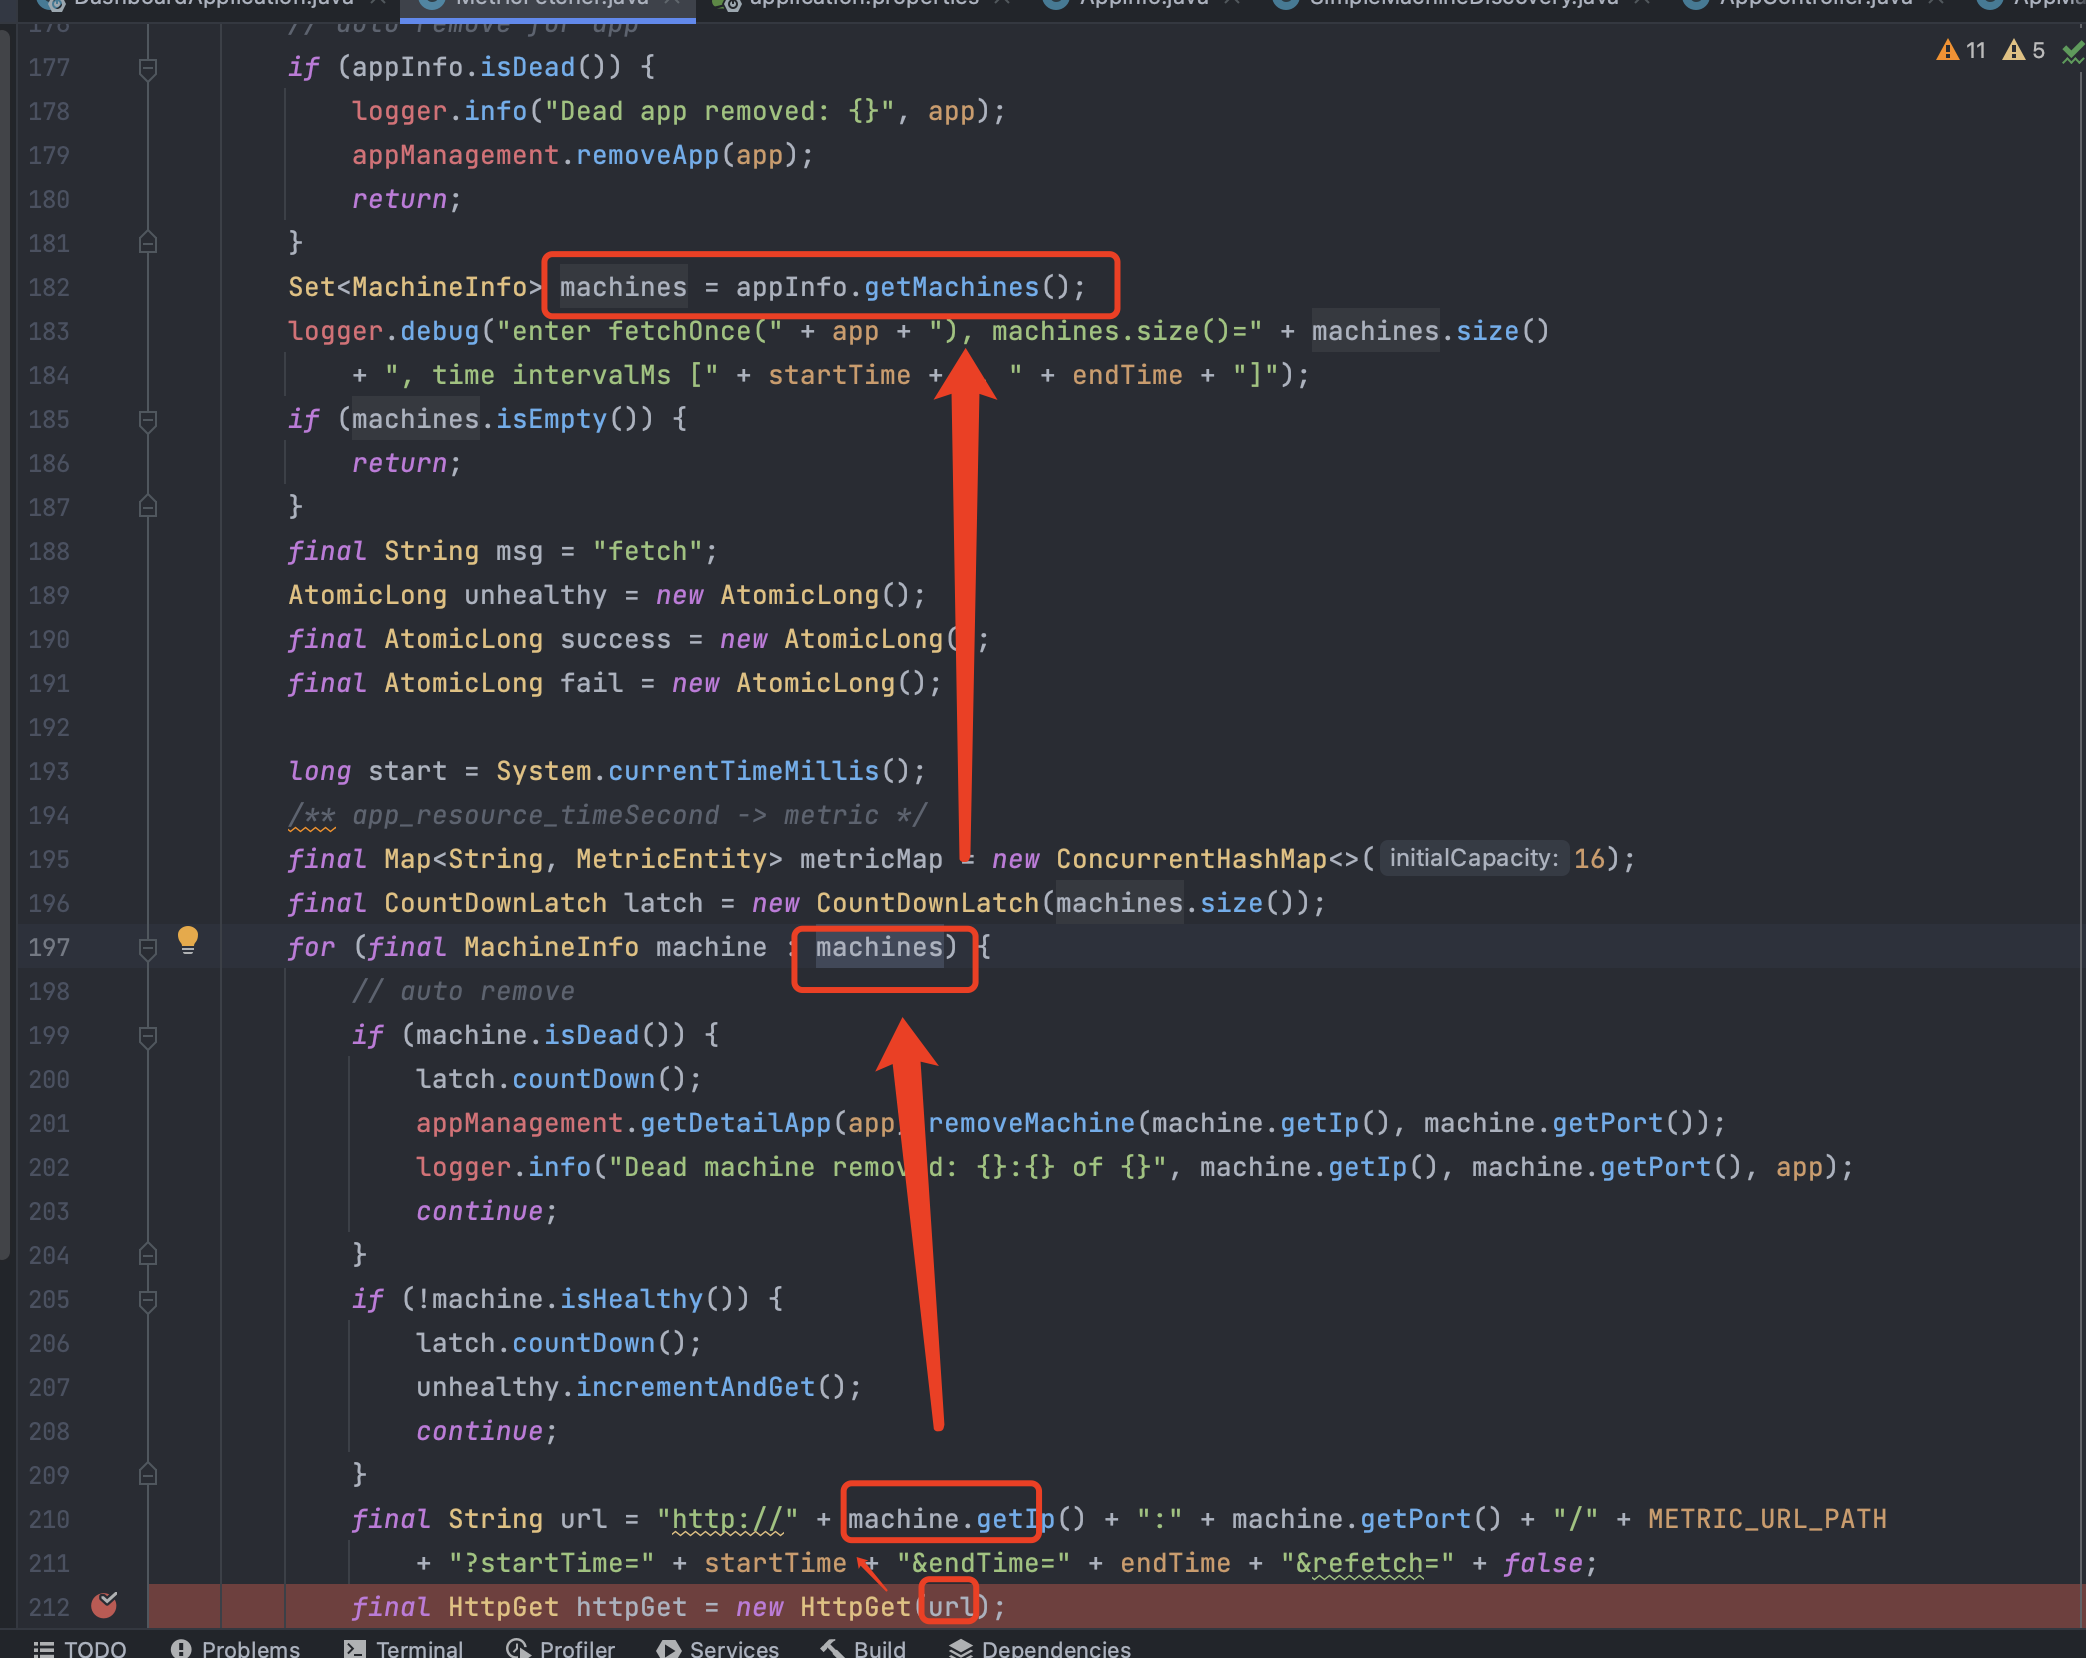
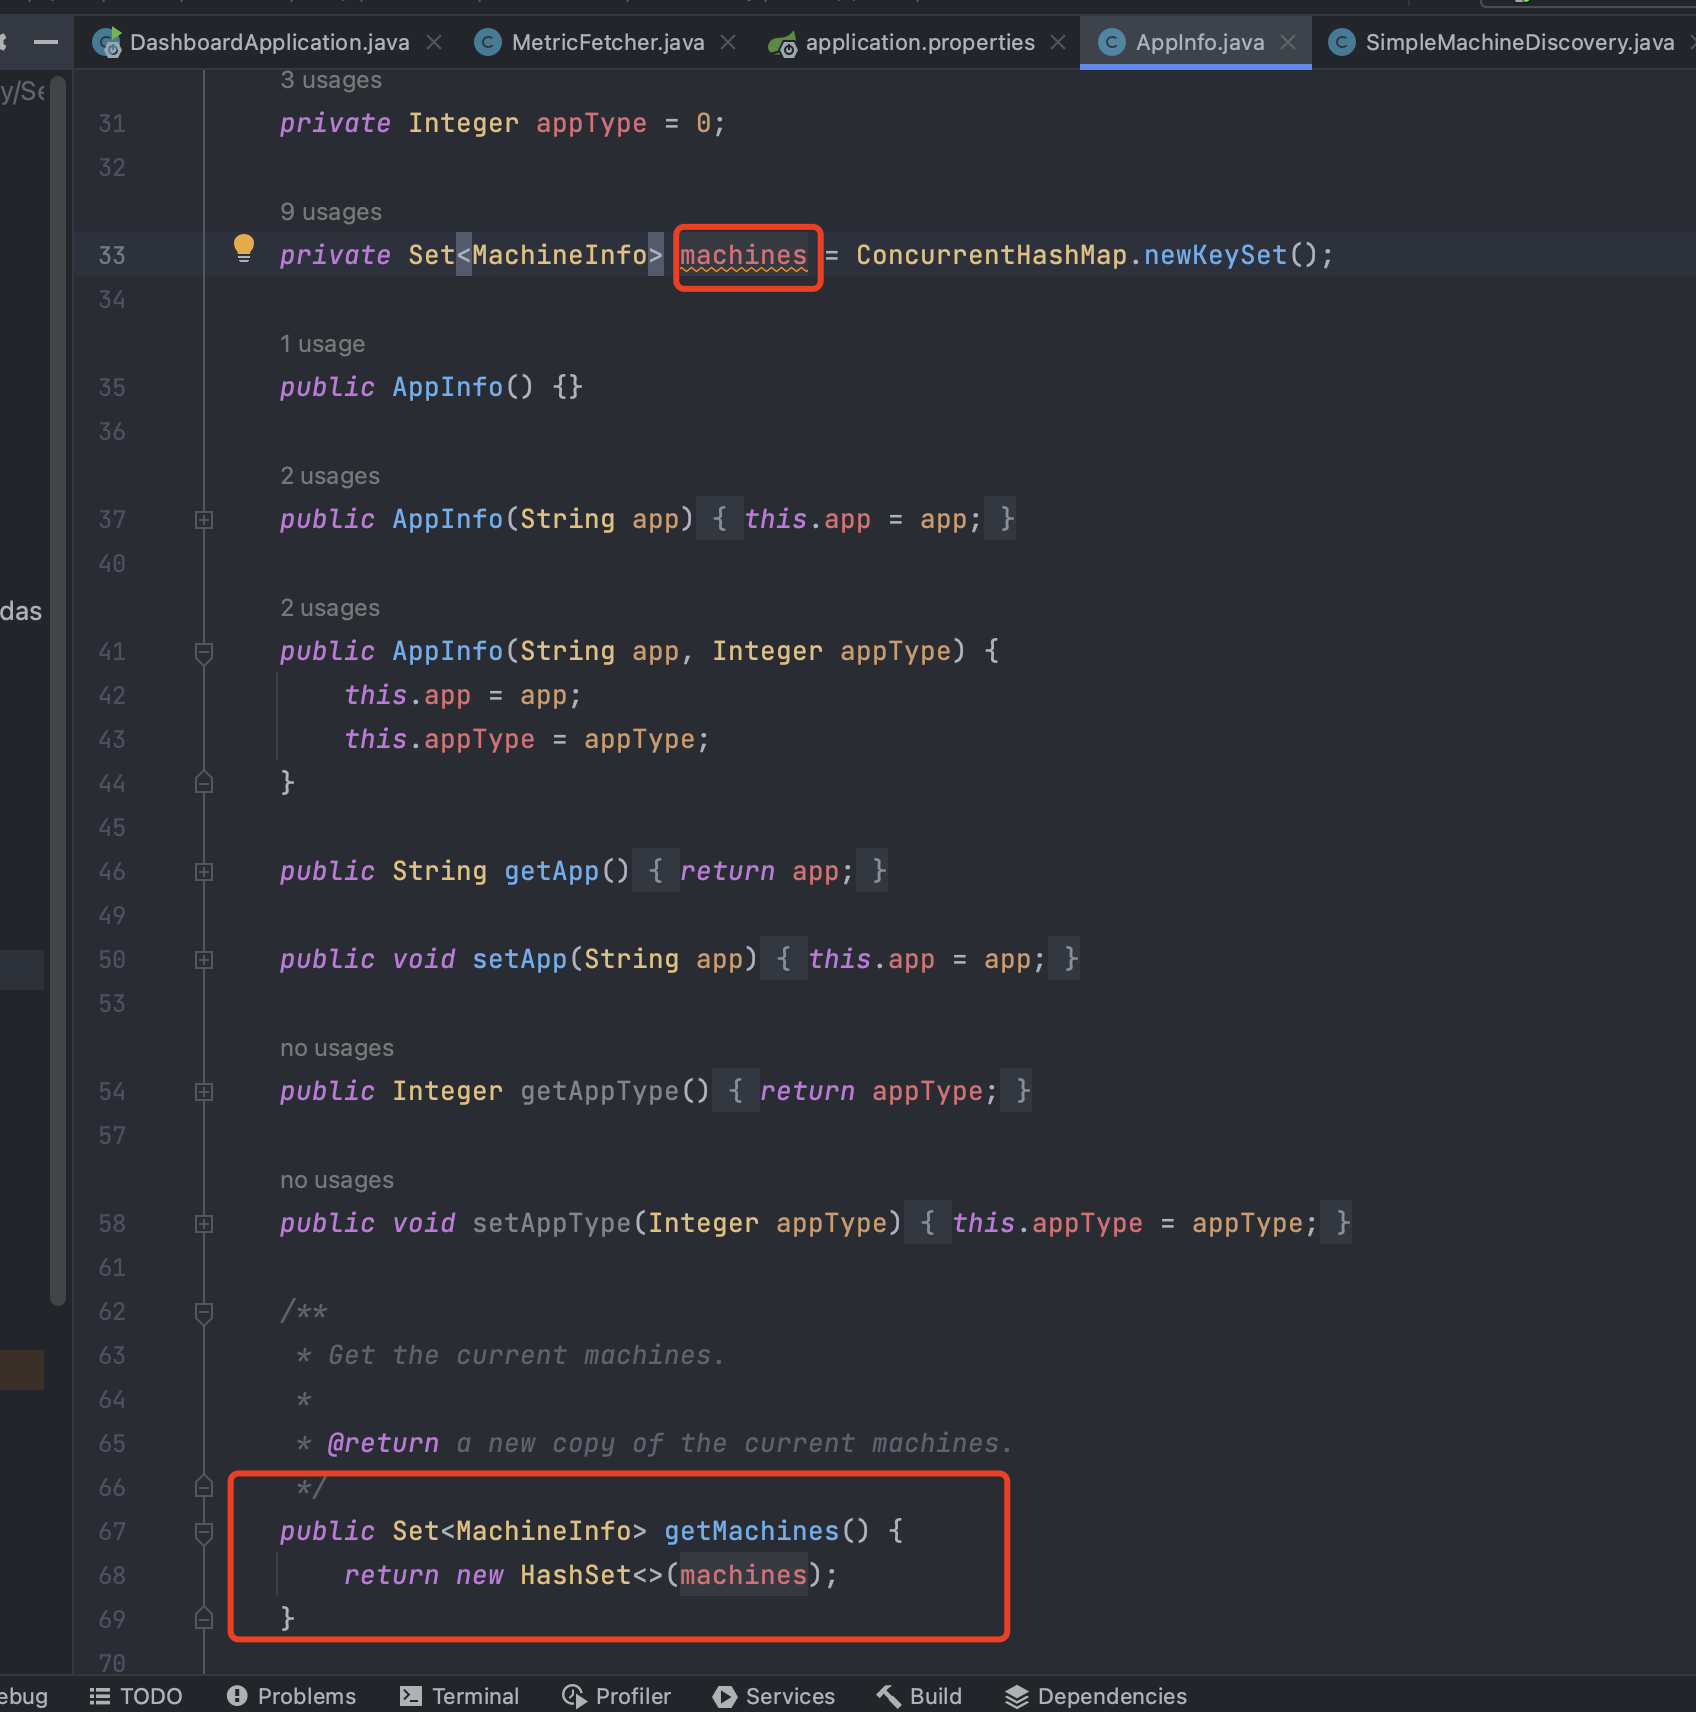
可以看到参数url是S machine.getIp() 和 machine.getPort() 获取了 IP 地址和端口号等,而 machine又是从 machines中遍历得到的,mechines又是从appInfo.getMachines得到的:

接着进入 appInfo.getMachines(); 方法
在这段代码中 getMachines 中 return 了 machines。而变量 machines 使用了 ConcurrentHashMap.newKeySet() 方法创建了一个线程安全的 Set集合

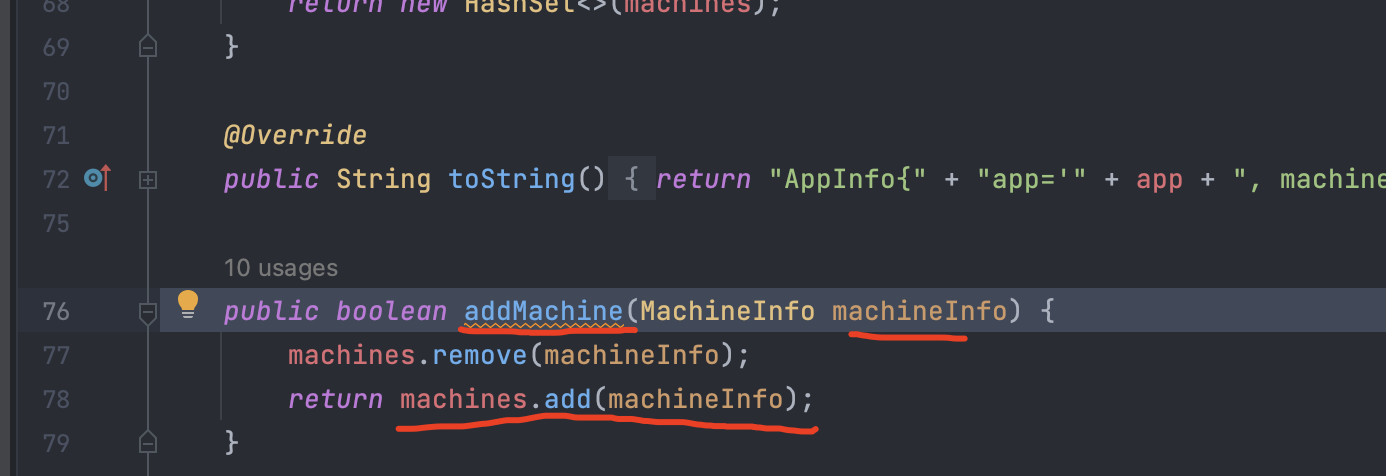
machines集合的内容是通过 addMachine 方法添加的:

继续追踪 addMachine 方法:
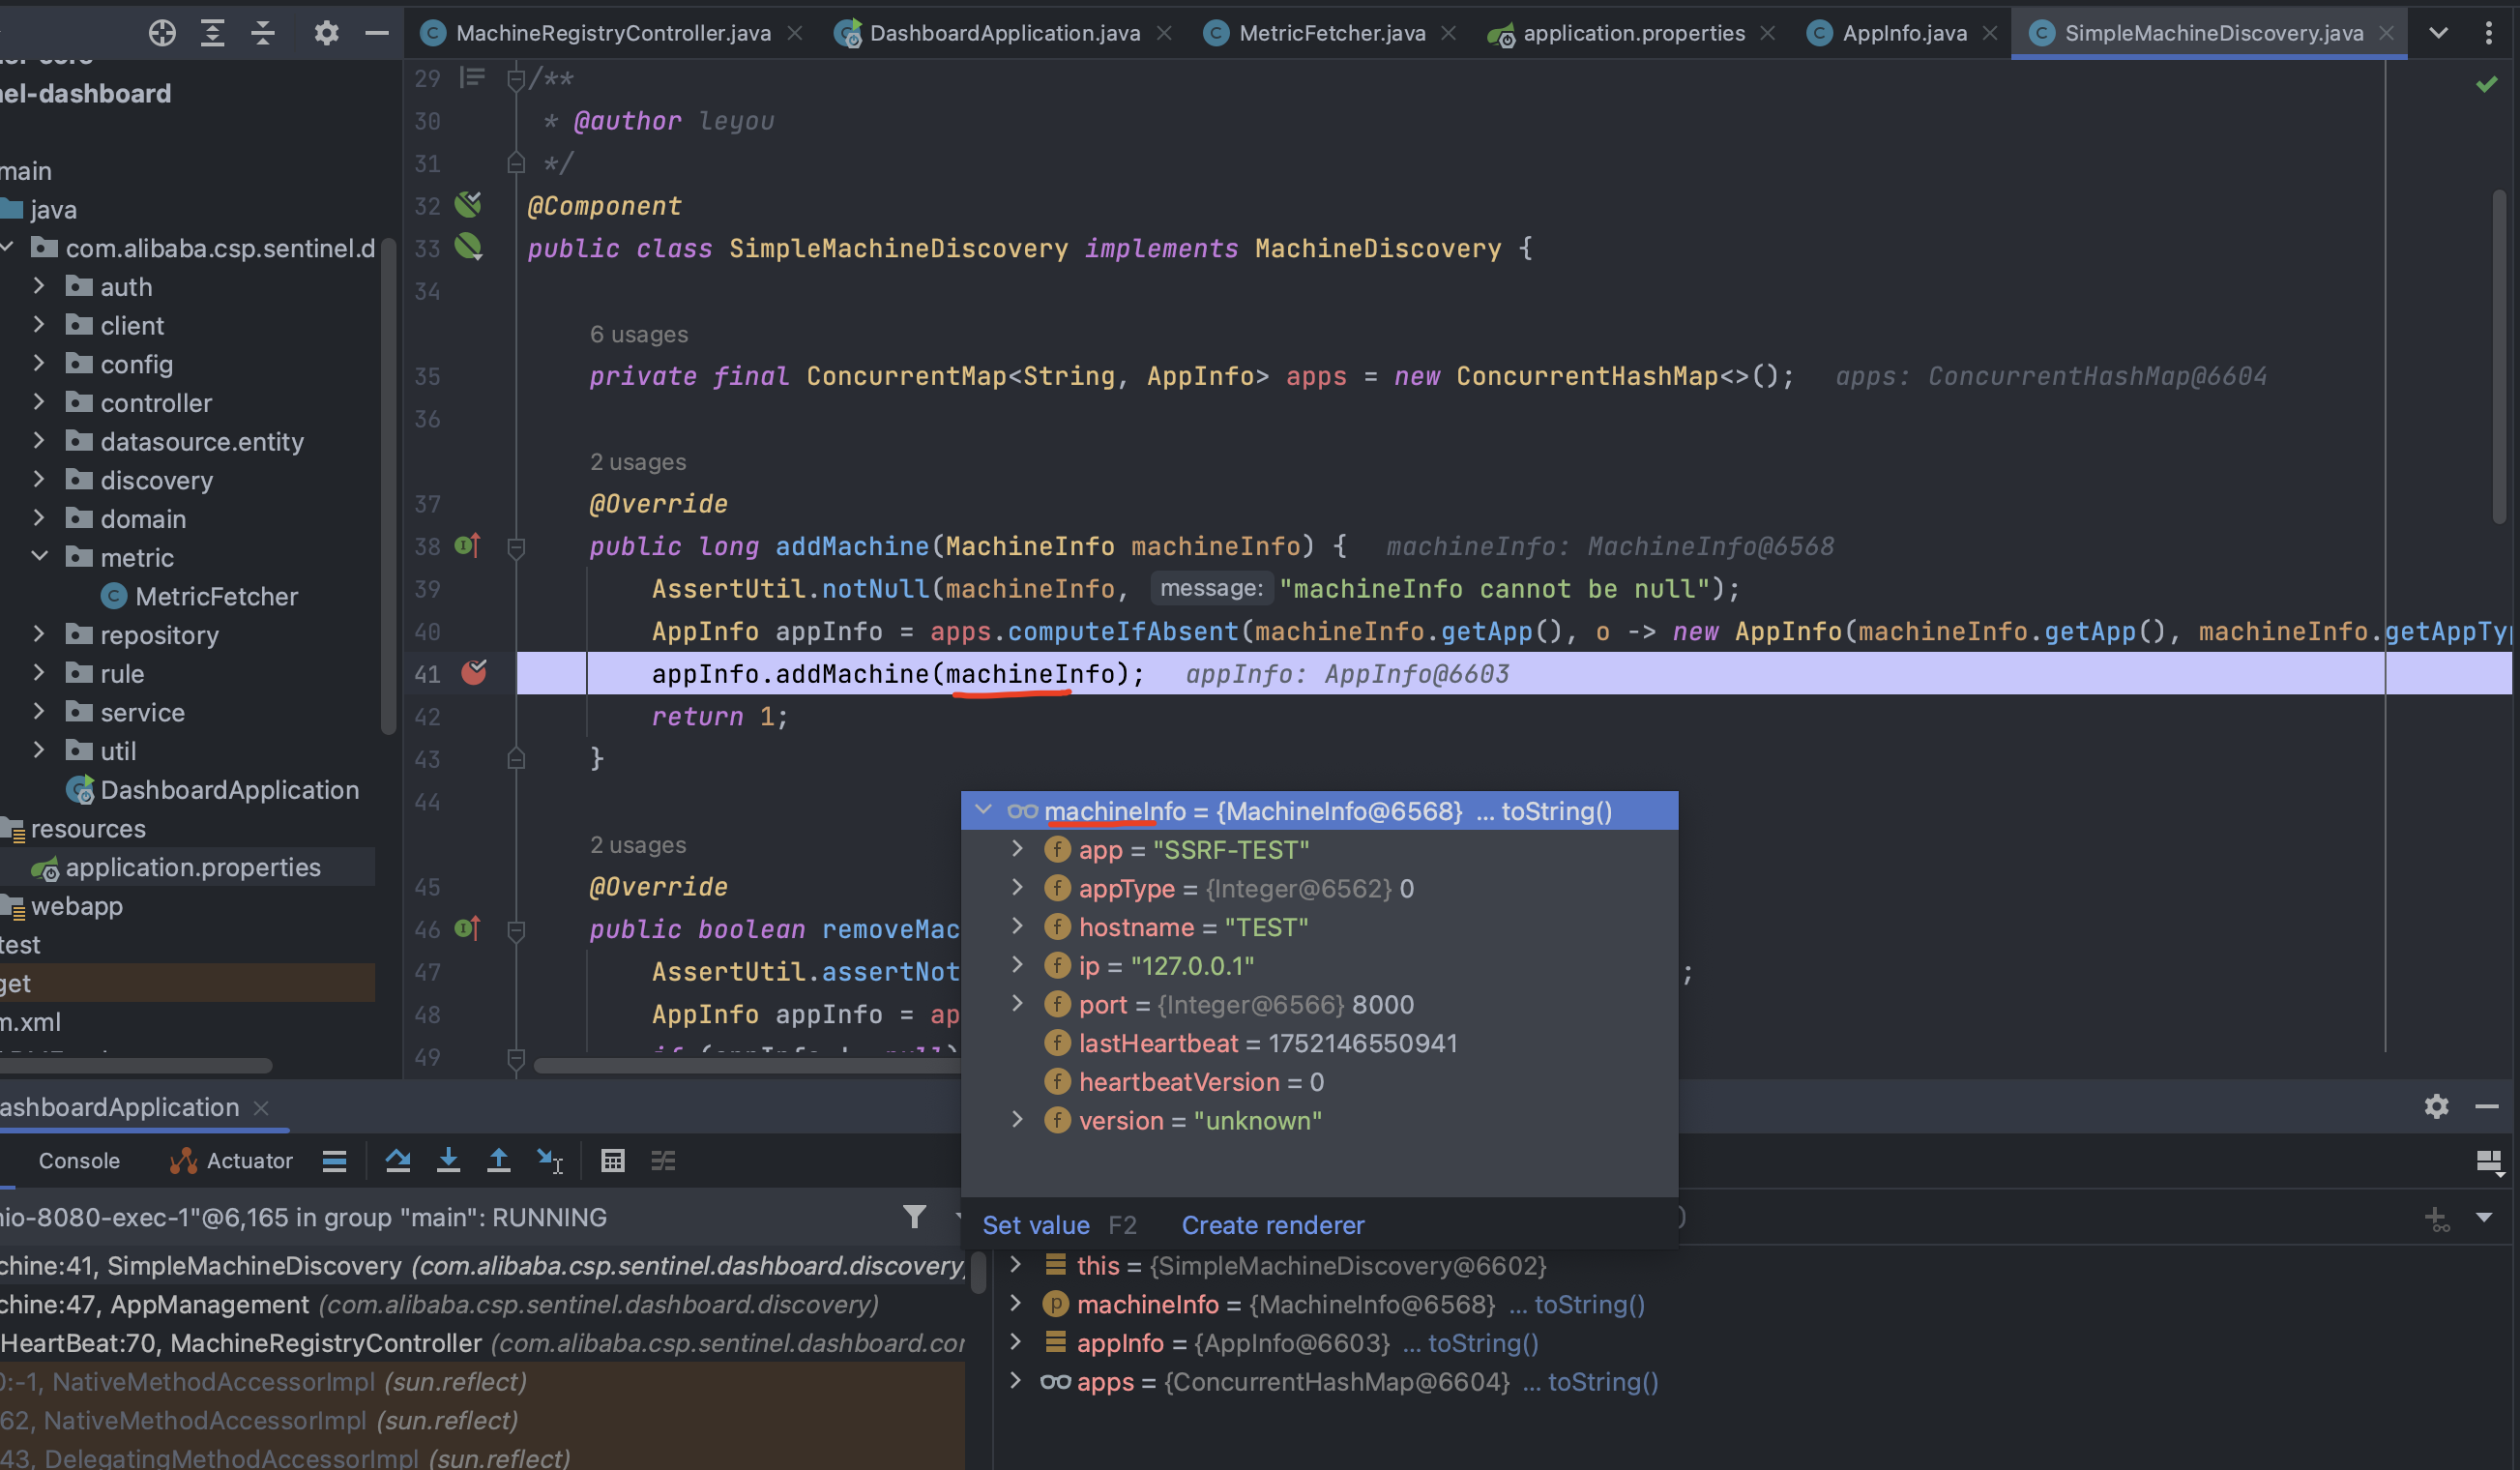
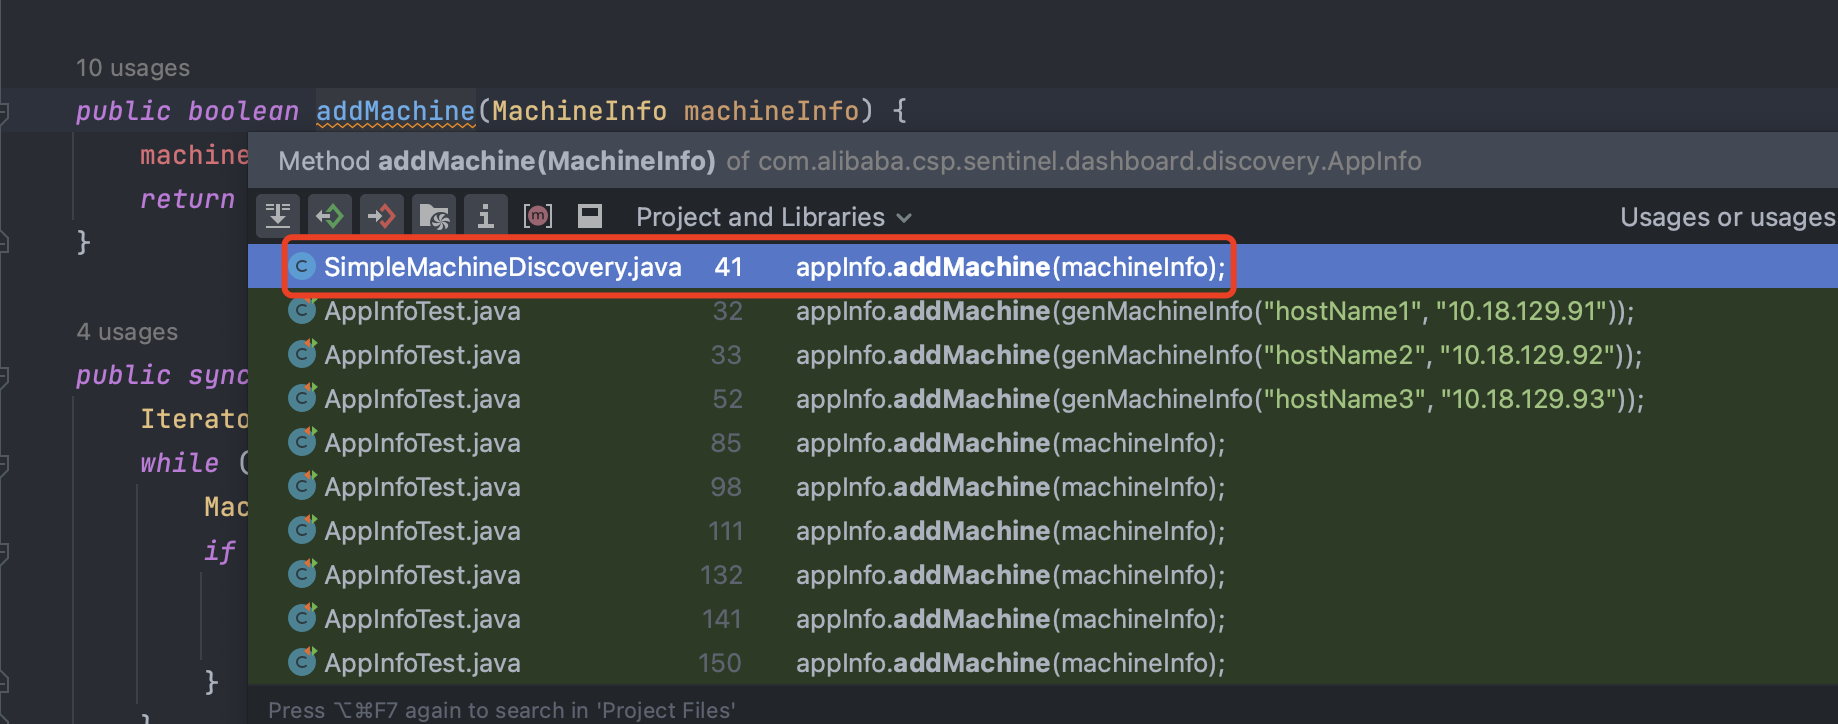
可以看到SimpleMachineDiscovery 类中调用了 addMachine 方法:

继续去找是谁调用了这个addMachine方法:

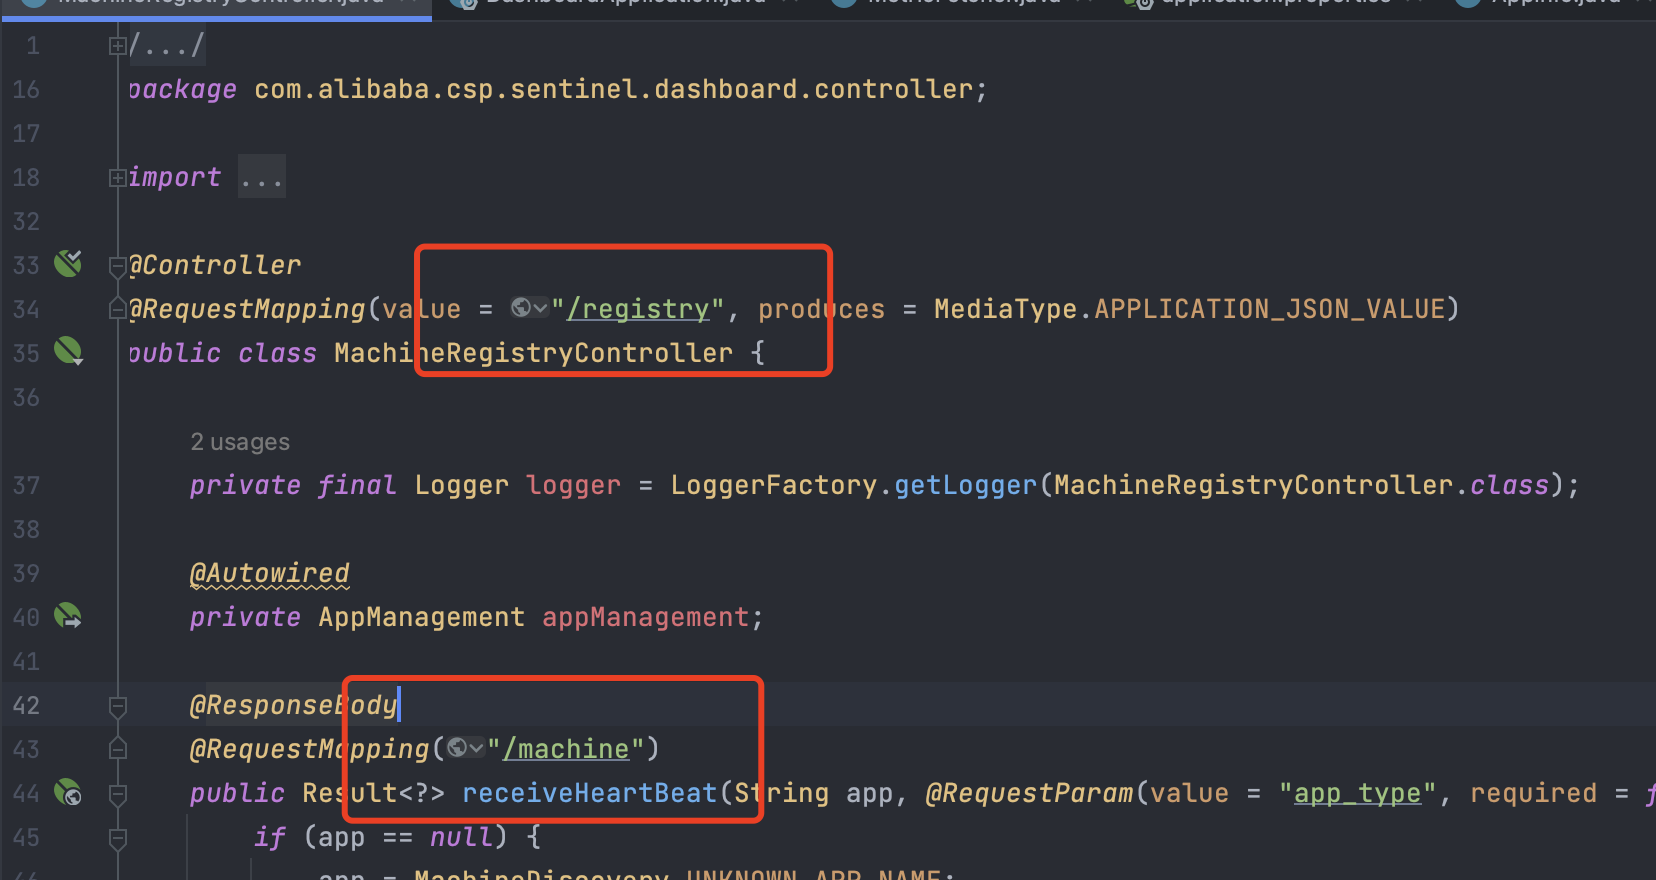
 查看调用关系发现,可以看到addMachine在MachineRegistryController和AppManagement中都被调用,但其实MachineRegistryController中也是调用的AppManagement中addMachine,并且Controller一般也会存在用户接口,所以直接来看MachineRegistryController:
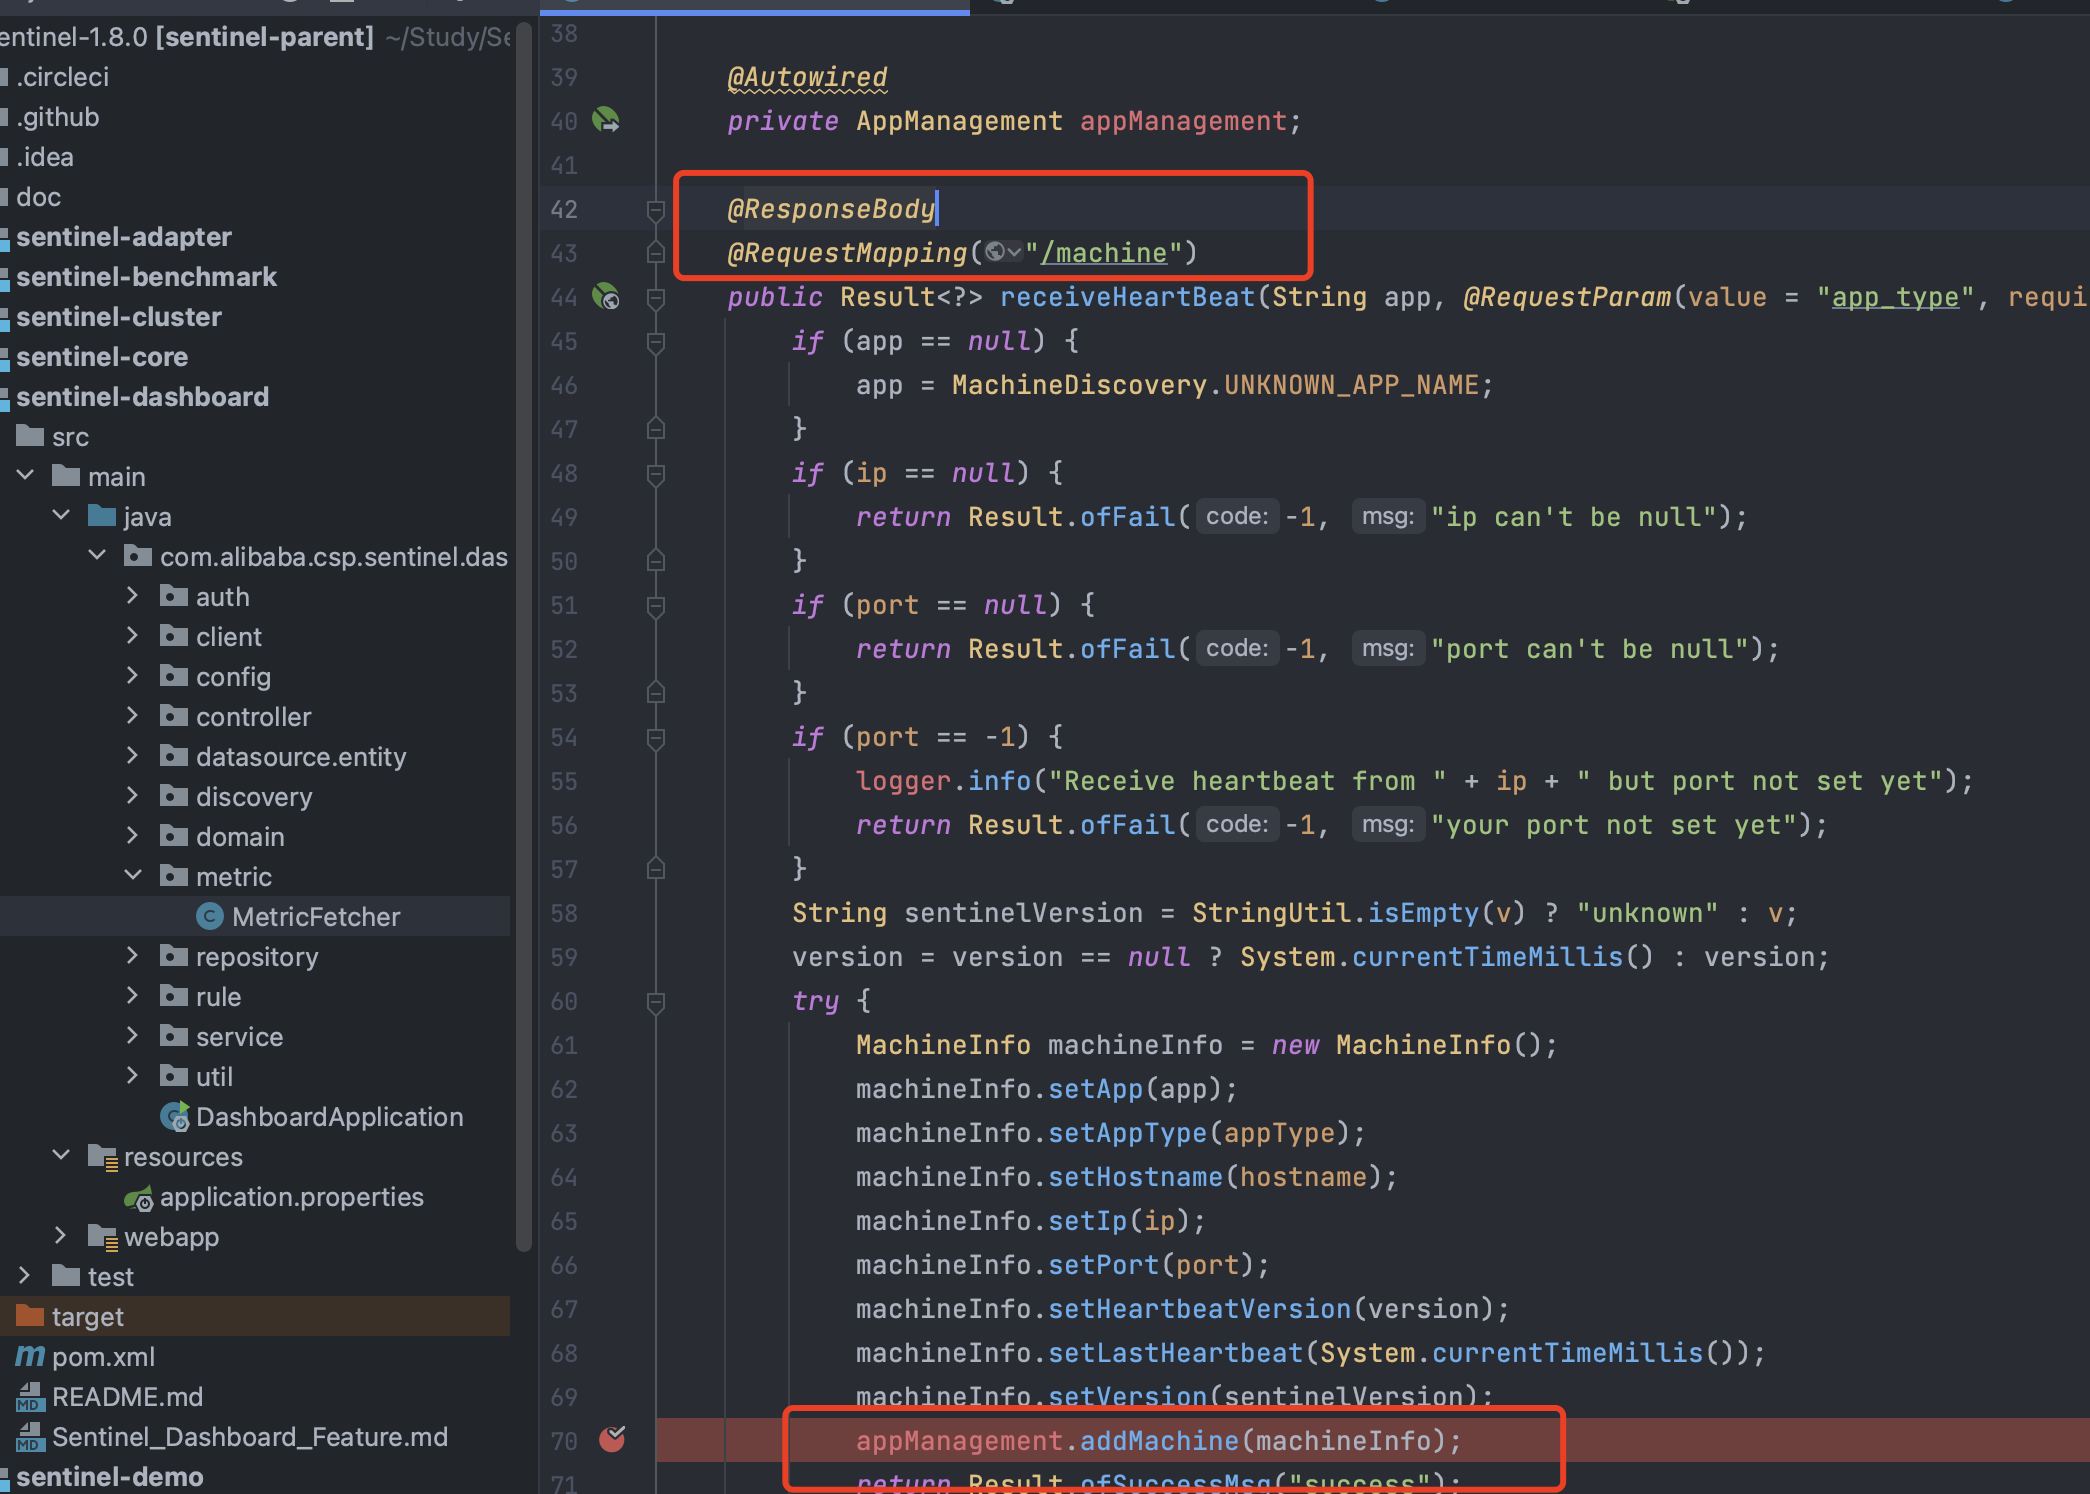
可以看到该方法中调用了addMachine,方法接收的参数为Integer appType, Long version, String v, String hostname, String ip, Integer por,接收到参数后,讲这些参数设置为 machineInfo 的属性,最后调用appManagement.addMachine(machineInfo);方法添加注册机器的信息:

看到接口的路径为:/registry/machine

至此找到了
总结下大致流程就是:参数从 MachineRegistryController传进来,其中涉及 IP 和 port,通过 appManagement.addMachine(machineInfo); 方法添加机器信息,最
终在 MetricFetcher 中使用了 start() 方法定时执行任务,其中有个任务是调用 fetchOnce方法执行HTTP GET 请求。
漏洞验证
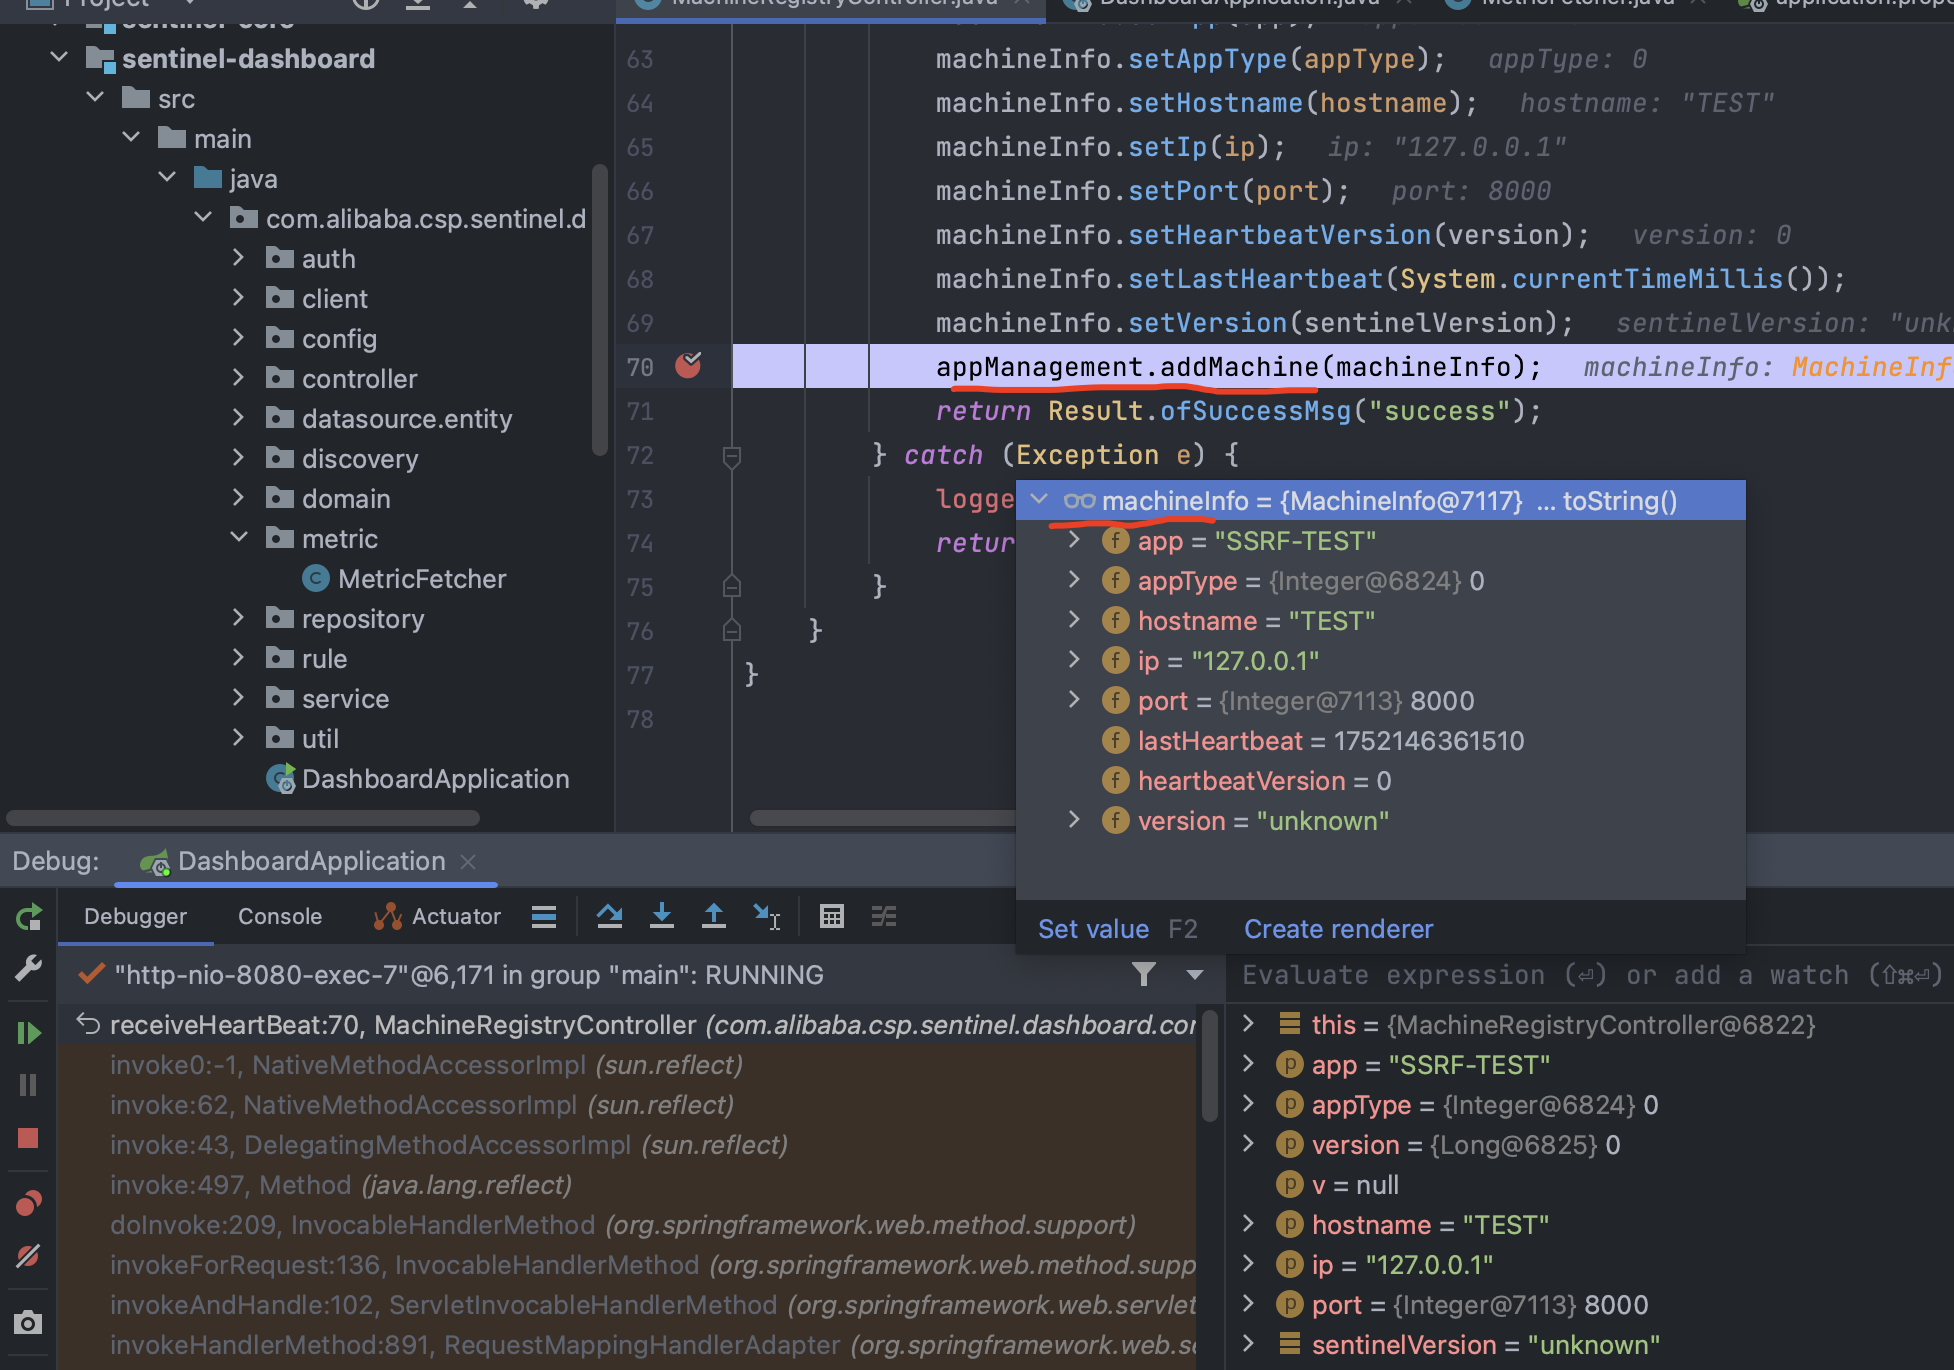
根据参数构造请求:http://127.0.0.1:8080/registry/machine?app=SSRF-TEST&appType=0&version=0&hostname=TEST&ip=127.0.0.1&port=8000
本地服务收到数据,存在SSRF:

看一下过程:


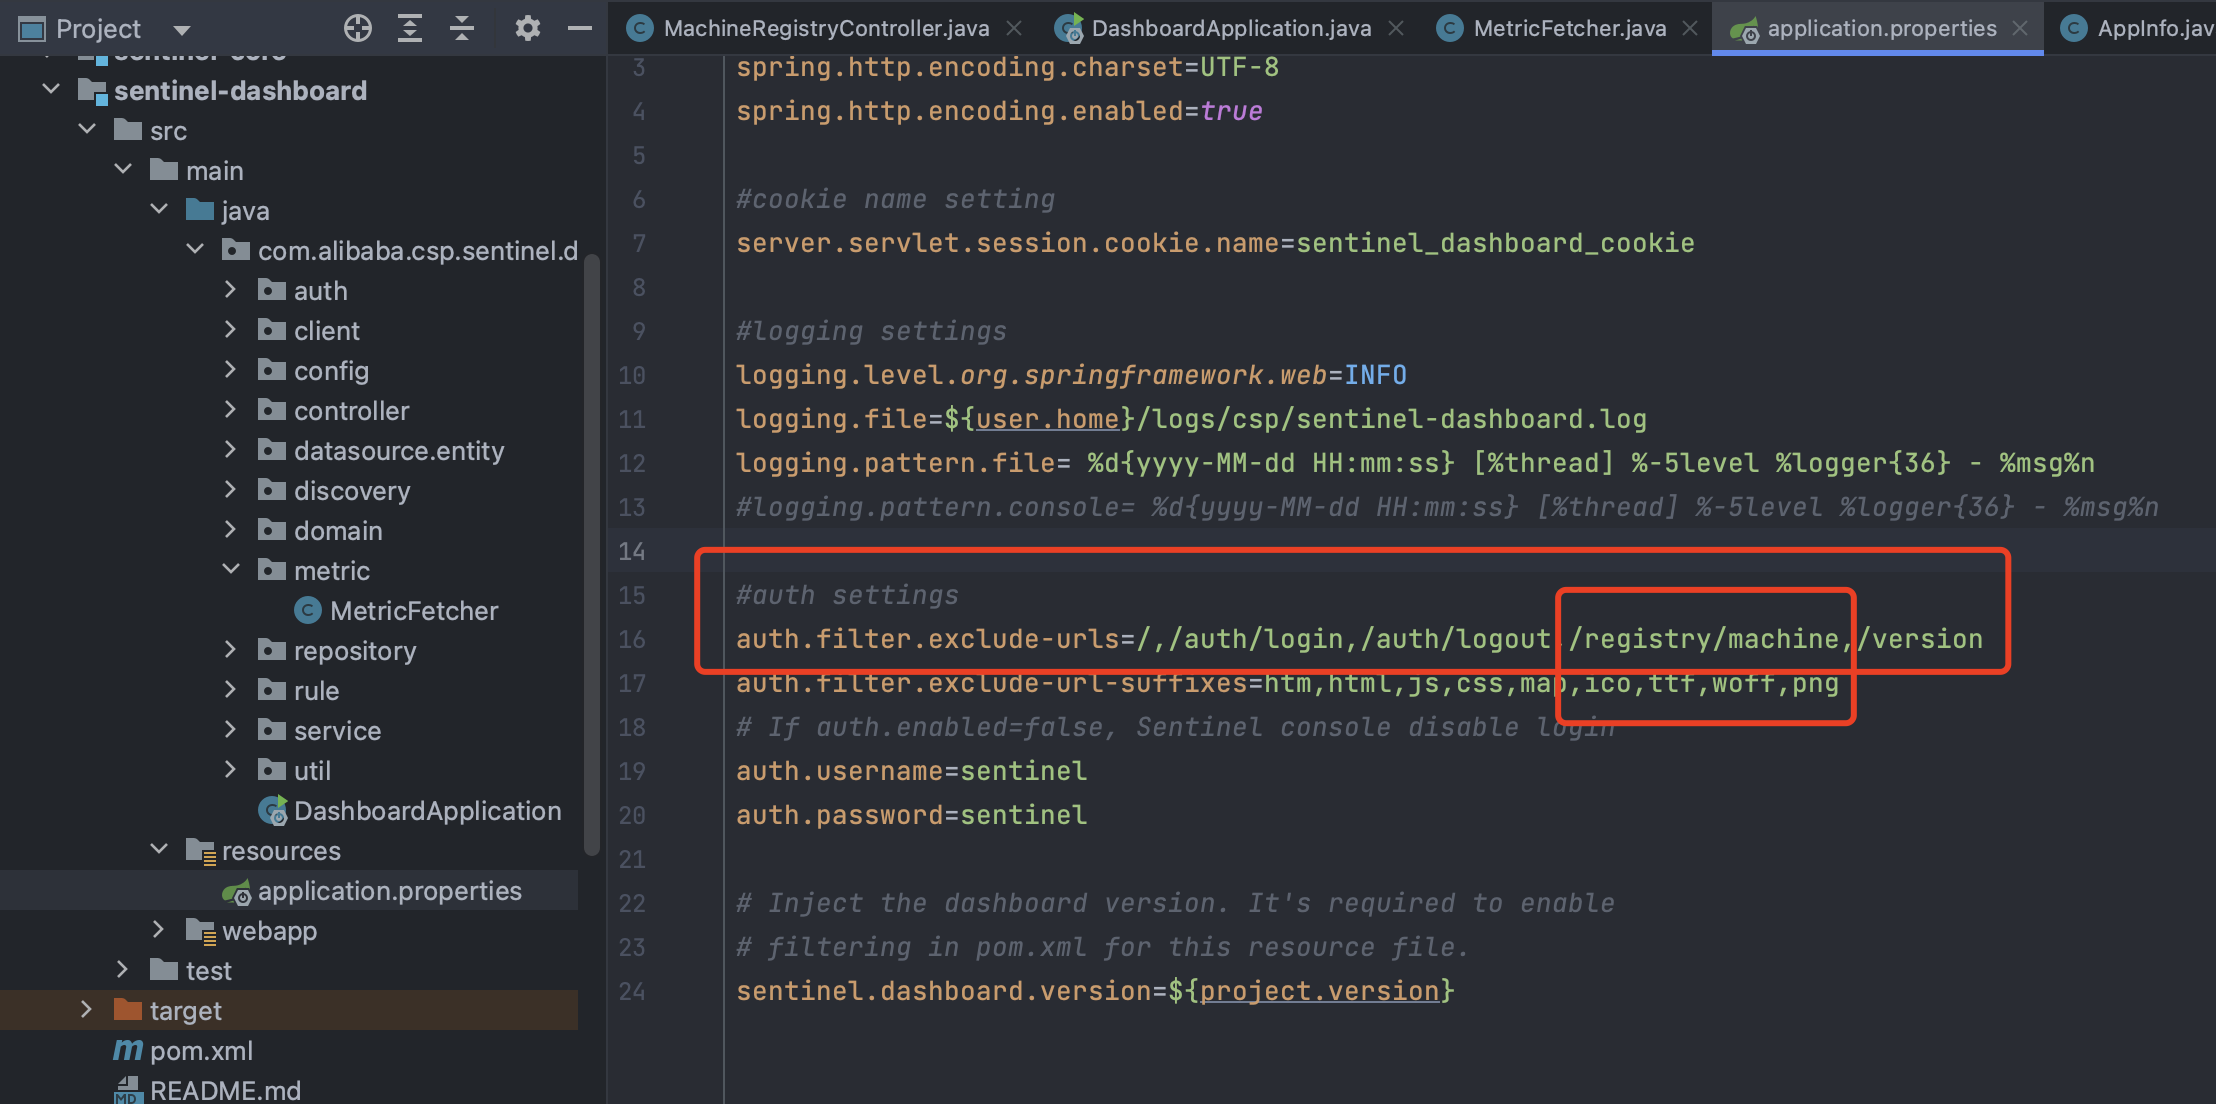
那为什么是未授权的呢?
可以看到刚好不需要认证:

另一个SSRF
漏洞点在接口state_single
https://xz.aliyun.com/news/18017

 查看调用关系发现,可以看到addMachine在MachineRegistryController和AppManagement中都被调用,但其实MachineRegistryController中也是调用的AppManagement中addMachine,并且Controller一般也会存在用户接口,所以直接来看MachineRegistryController: